
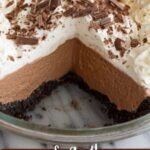
There is something irresistibly comforting about a smooth, creamy chocolate dessert that comes together without turning on the oven. The No Bake Chocolate Pudding Pie Recipe is a revelation for chocolate lovers who want a rich, decadent treat with minimal fuss. This luscious pie combines a crunchy chocolate cookie crust with a silky, deeply chocolatey pudding filling that sets beautifully in the fridge. Whether it’s a last-minute dessert or a sweet ending for a family dinner, this No Bake Chocolate Pudding Pie Recipe delivers on flavor, texture, and pure indulgence every single time.
Ingredients You’ll Need
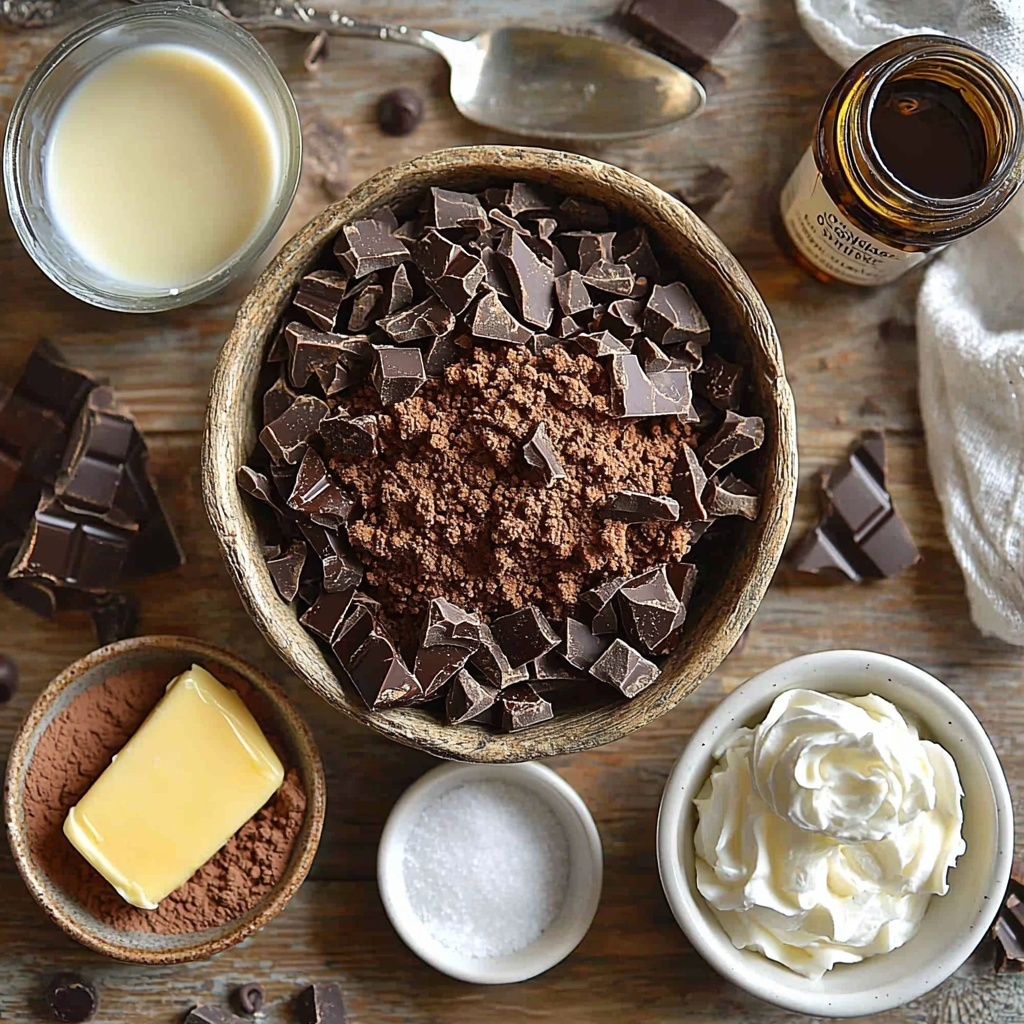
The magic of this pie lies in its simple, everyday ingredients that work harmoniously to create a dessert that tastes far more special than its humble components. Each item plays its part in building a perfect balance of flavor, texture, and luscious color.
- 2 cups chocolate sandwich cookies (crushed into crumbs): This forms the crisp, flavorful base for your pie, giving it that delightful chocolate crunch.
- 6 tablespoons melted butter: Binds the cookie crumbs together while adding richness to the crust.
- 2 ½ cups almond milk (or regular milk): Provides the creamy liquid foundation essential for the pudding’s smooth texture.
- ½ cup granulated sugar: Adds the perfect amount of sweetness to balance the cocoa’s bitterness.
- ⅓ cup unsweetened cocoa powder: Brings intense chocolate flavor and a gorgeous dark color to the pie filling.
- ¼ cup cornstarch: The secret thickening agent that turns the pudding silky and sets it perfectly.
- ¼ teaspoon salt: Elevates all the flavors, ensuring the chocolate isn’t flat or dull.
- ½ teaspoon vanilla extract: Enhances the chocolate with a warm, aromatic note.
- 1 cup dairy-free or regular chocolate chips (optional): Adds extra richness and a gooey texture when melted into the pudding.
- Whipped cream (regular or non-dairy): For topping, offering that light, airy contrast to the dense pudding.
- Shaved chocolate or chocolate curls: To garnish and add an elegant, irresistible finishing touch.
How to Make No Bake Chocolate Pudding Pie Recipe
Step 1: Prepare the Crust
Start by combining those crushed chocolate sandwich cookies with the melted butter in a bowl. This step is simple but crucial because the butter acts as a glue for your crumbs, turning them into a firm, buttery crust. Once mixed, press the crumb mixture firmly and evenly into a 9-inch pie pan, making sure to cover both the bottom and sides. Using a flat-bottomed glass or spoon helps pack everything tight so your crust holds together perfectly. Pop it in the fridge for 20 minutes to firm up while you move on to the filling.
Step 2: Make the Chocolate Pudding Filling
In a medium saucepan, whisk together sugar, cocoa powder, cornstarch, and salt — this dry mix forms the base of your luscious pudding. Gradually add almond milk, stirring constantly to dissolve every bit of the dry ingredients, ensuring no lumps form. Place the pan over medium heat, stirring continuously for about 8 to 10 minutes until the mixture thickens and bubbles up. This is the moment when your kitchen will start smelling overwhelmingly chocolatey and oh-so-wonderful. Remove from heat, stir in the vanilla extract, and if you’re feeling extra indulgent, toss in the chocolate chips and stir until they melt smoothly into the pudding.
Step 3: Assemble and Chill
Pour the warm chocolate pudding filling into the chilled crust and carefully smooth it out with a spatula. Immediately cover the pie with plastic wrap, making sure to press it directly onto the pudding surface—this little trick stops that annoying pudding skin from forming. Refrigerate the pie for at least 4 hours, giving it ample time to set into a creamy, sliceable perfection.
How to Serve No Bake Chocolate Pudding Pie Recipe
Garnishes
Serving this pie is your chance to get creative or keep it classic. A cloud of whipped cream on top adds a wonderfully light contrast to the dense chocolate filling. For an elegant twist, sprinkle shaved chocolate or chocolate curls over the cream to add texture and visual appeal that will impress anyone lucky enough to get a slice.
Side Dishes
Pair your pie with fresh berries like raspberries or strawberries to cut through the richness and introduce a bright, tart element. If you want to keep things cozy, a scoop of vanilla or coffee ice cream works beautifully, enhancing the pie’s creaminess and adding a cool temperature play.
Creative Ways to Present
If you’re hosting a crowd, consider serving the pie in individual clear glasses — layers of crust, pudding, and whipped cream make for a stunning and easy-to-serve dessert. You could also customize the topping with nuts, toasted coconut flakes, or a drizzle of caramel or raspberry sauce for something truly special.
Make Ahead and Storage
Storing Leftovers
Once you have leftovers, store the pie tightly covered in the refrigerator. It will stay fresh and creamy for up to 3-4 days, giving you plenty of time to savor every last bite without any rush.
Freezing
You can freeze the pie if you want to keep it longer. Wrap it well in plastic wrap and aluminum foil before placing it in the freezer. When you’re ready to enjoy, defrost it overnight in the refrigerator. Keep in mind, freezing might change the pudding’s texture slightly, but it will still taste delicious.
Reheating
This pie is best served chilled, so reheating isn’t necessary. If you prefer it slightly softened, let it sit at room temperature for 15-30 minutes before serving. Avoid using heat as it will affect the pudding’s texture and firmness.
FAQs
Can I use gluten-free cookies for the crust?
Absolutely! Gluten-free chocolate sandwich cookies work perfectly for the crust, making this dessert suitable for those avoiding gluten without sacrificing flavor or texture.
Is it possible to make the pie vegan?
Yes! Use almond or any plant-based milk, dairy-free chocolate chips, and non-dairy whipped cream to keep the pie completely vegan while still being incredibly delicious.
Why is cornstarch used in this recipe?
Cornstarch acts as a thickener for the pudding, helping it set properly so it holds firm when sliced but remains smooth and creamy in texture.
Can I make the filling ahead of time and assemble later?
It’s best to assemble and chill the pie shortly after making the filling. If you prepare the pudding in advance, store it covered in the fridge and give it a good stir before pouring it into the crust.
What can I substitute if I don’t have almond milk?
Any type of milk you prefer will work well, whether it’s dairy or another plant-based milk like oat, soy, or coconut milk. Just choose what suits your taste and dietary needs.
Final Thoughts
This No Bake Chocolate Pudding Pie Recipe is such a joy to make and even more delightful to share. Its simplicity doesn’t compromise its flavor one bit—each bite is velvety chocolate heaven balanced perfectly with a crisp crust. Whether it’s for a special occasion or just a treat to brighten your day, you’ll find yourself returning to this recipe again and again. Give it a try, and watch how fast it becomes a cherished favorite in your kitchen too!
Print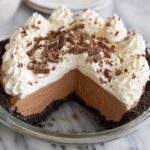
No Bake Chocolate Pudding Pie Recipe
- Prep Time: 10 minutes
- Cook Time: 10 minutes
- Total Time: 4 hours 20 minutes
- Yield: 8 servings
- Category: Dessert
- Method: Stovetop
- Cuisine: American
- Diet: Vegetarian
Description
A luscious and effortless No Bake Chocolate Pudding Pie featuring a crunchy chocolate cookie crust and a smooth, rich chocolate pudding filling. This dessert combines the decadence of chocolate with a creamy texture, perfect for those who want a delicious treat without turning on the oven.
Ingredients
Crust
- 2 cups chocolate sandwich cookies, crushed into crumbs
- 6 tablespoons melted butter
Filling
- 2 ½ cups almond milk (or regular milk)
- ½ cup granulated sugar
- ⅓ cup unsweetened cocoa powder
- ¼ cup cornstarch
- ¼ teaspoon salt
- ½ teaspoon vanilla extract
- 1 cup dairy-free or regular chocolate chips (optional)
Toppings
- Whipped cream (regular or non-dairy)
- Shaved chocolate or chocolate curls
Instructions
- Prepare the crust: Combine the crushed chocolate sandwich cookie crumbs and melted butter in a mixing bowl, stirring until the crumbs are fully coated and resemble wet sand.
- Form the crust: Press the cookie mixture evenly into the bottom and up the sides of a 9-inch pie pan. Use a flat-bottomed glass or spoon to firmly pack the crust for stability.
- Chill the crust: Place the crust in the refrigerator for 20 minutes to set while you prepare the filling.
- Mix dry ingredients: In a medium saucepan, whisk together the granulated sugar, unsweetened cocoa powder, cornstarch, and salt until combined.
- Add milk slowly: Gradually pour in the almond milk (or regular milk) while stirring constantly to dissolve the dry ingredients and prevent lumps.
- Cook the pudding: Heat the mixture over medium heat, stirring continuously. Cook until the mixture thickens and becomes bubbly, about 8 to 10 minutes.
- Add flavor and chocolate: Remove the saucepan from heat and stir in the vanilla extract. If using, stir in the chocolate chips until fully melted and incorporated into the pudding.
- Assemble the pie: Pour the warm pudding mixture into the chilled cookie crust. Smooth the surface with a spatula for an even finish.
- Prevent skin formation: Cover the pie tightly with plastic wrap, pressing it down gently so that it touches the surface of the pudding to prevent a skin from forming.
- Chill the pie: Refrigerate the pie for at least 4 hours or until the pudding is fully set and firm.
- Serve: Before serving, top with whipped cream and garnish with shaved chocolate or chocolate curls. Slice and enjoy your decadent no bake chocolate pudding pie!
Notes
- Using almond milk makes this pie dairy-free; regular milk will work if not avoiding dairy.
- If preferred, substitute chocolate sandwich cookies with gluten-free alternatives for a gluten-free version.
- For a richer pudding, full-fat milk can be used.
- Chocolate chips are optional but add extra gooey chocolate flavor.
- Pressing the plastic wrap against the pudding helps avoid a skin forming on top.
- Ensure to chill long enough so the pudding sets firmly for easy slicing.
