“`html
If you’re craving all the juicy satisfaction of a classic cheeseburger but want to keep things fresh, nutritious, and meal-prep friendly, you have to try the High-Protein Cheeseburger Bowls for Meal Prep Recipe. These bowls deliver everything you love about a cheeseburger—the savory seasoned meat, the melty cheese, the vibrant veggies—without the bun, making them a perfect protein-packed dish you can whip up quickly and enjoy all week long. Whether you’re fueling a busy schedule or just want a tasty, balanced lunch, this recipe is a total winner that keeps your meals exciting and bursting with flavor.
Ingredients You’ll Need
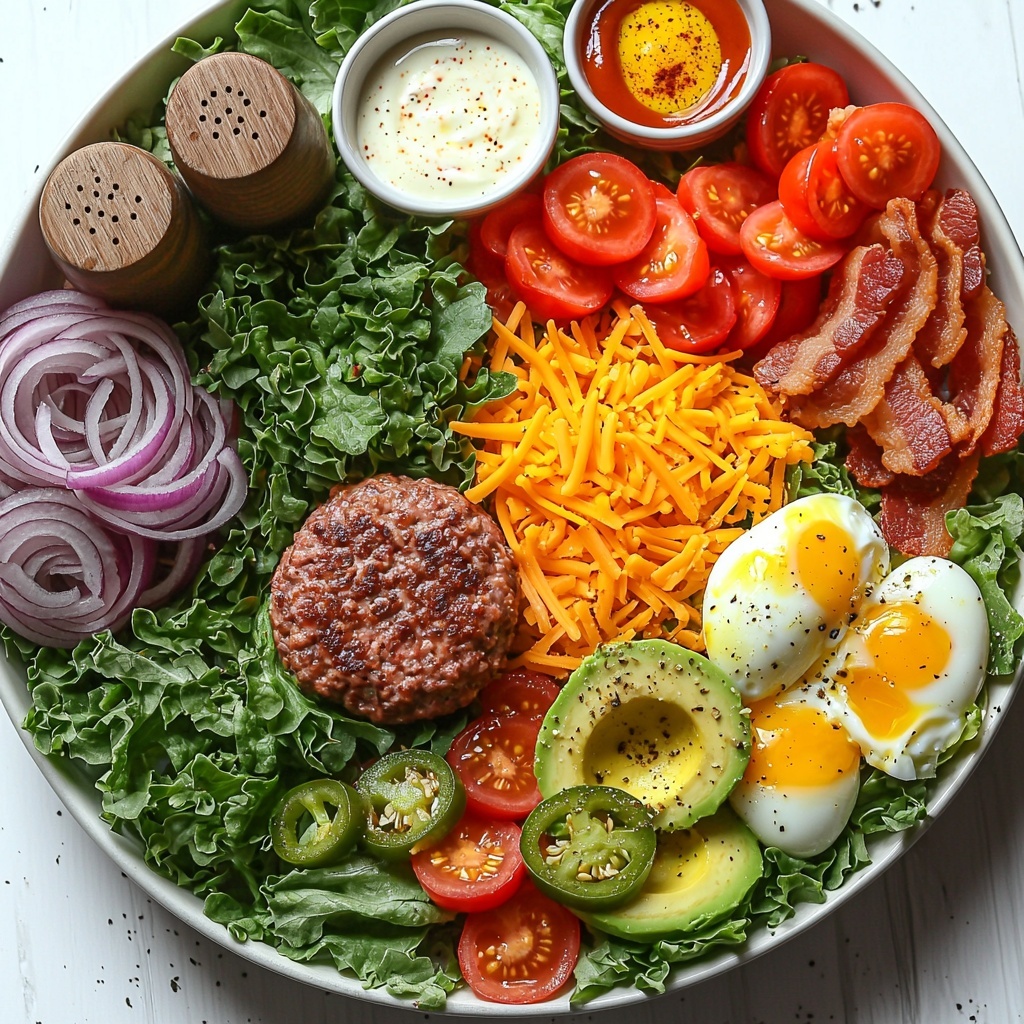
Putting together the High-Protein Cheeseburger Bowls for Meal Prep Recipe is delightfully simple because each ingredient plays a starring role in creating layers of flavor and texture. From the savory lean ground beef to the crisp freshness of the vegetables and the creamy, tangy sauce, every component contributes to making this bowl both satisfying and colorful.
- 1 lb lean ground beef or turkey (90% lean): The heart of your bowl, perfectly seasoned for rich, meaty flavor without excess fat.
- Salt: Enhances all the flavors and balances the ingredients beautifully.
- Pepper: Adds a gentle heat and a subtle bite to the meat and sauce.
- Garlic powder: Brings aromatic depth to the ground meat and the dressing.
- Onion powder: Complements the garlic and rounds out the seasoning on the meat.
- 4 cups chopped lettuce: Provides a refreshing, crisp base; or swap for quinoa, brown rice, or cauliflower rice for a different texture.
- 1 cup cherry tomatoes (halved): Juicy bursts of sweetness and acidity making every bite lively.
- 1/2 cup sliced dill pickles: Offers that signature tang and crunch you expect in a cheeseburger.
- 1/2 medium red onion (thinly sliced): Adds sharpness and a bit of crunch, which you can replace with cucumbers if you prefer.
- 1 cup shredded cheddar or American cheese: The melty, gooey classic cheeseburger touch—dairy-free cheese works great for vegan bowls.
- 1 medium avocado (sliced): Brings creamy richness and healthy fats to balance the bowl.
- 4 strips cooked bacon: For those who love crispy smokiness enhancing every spoonful.
- Jalapeño slices: Just the right amount of spice for a little kick if you like it hot.
- 4 medium fried eggs (optional): A perfect protein boost for extra sustenance and comfort.
- 1/2 cup low-fat Greek yogurt: The creamy base for a tangy, lighter sauce that ties everything together.
- 1 tbsp mustard: Adds a sharp, zesty flavor that’s classic to cheeseburger taste.
- 1 tbsp ketchup: Sweet and tangy, essential for that familiar burger vibe—go sugar-free if you want to cut carbs.
- 1/2 tsp garlic powder: Infuses the sauce with a gentle garlicky lift.
- 1/2 tsp paprika: Adds subtle smokiness and color to brighten the sauce.
- Salt and pepper to taste: To perfectly season the sauce for a well-rounded finish.
How to Make High-Protein Cheeseburger Bowls for Meal Prep Recipe
Step 1: Cook the Meat
Start by heating a large skillet over medium heat and add your lean ground beef or turkey. Season it generously with salt, pepper, garlic powder, and onion powder, then cook for 8 to 10 minutes. Stir occasionally until the meat is fully browned and cooked through. If there’s excess fat, make sure to drain it off—this keeps the dish lighter and lets the flavors shine.
Step 2: Prep Your Base and Veggies
While your meat is cooking, get your base ready. If you’re using lettuce, chop 4 cups finely. Alternatively, you can prepare 2 cups of cooked quinoa, brown rice, or sauté cauliflower rice until tender for a low-carb option with extra fiber and texture. Then, halve the cherry tomatoes, slice the dill pickles, and thinly slice the red onion, or swap with cucumbers if you prefer milder crunch.
Step 3: Whisk the Sauce
In a small bowl, combine the low-fat Greek yogurt, mustard, ketchup, garlic powder, paprika, salt, and pepper. Whisk everything together until smooth and creamy. This sauce is your secret weapon, bringing creaminess and tang that mimic the classic cheeseburger experience without any heaviness.
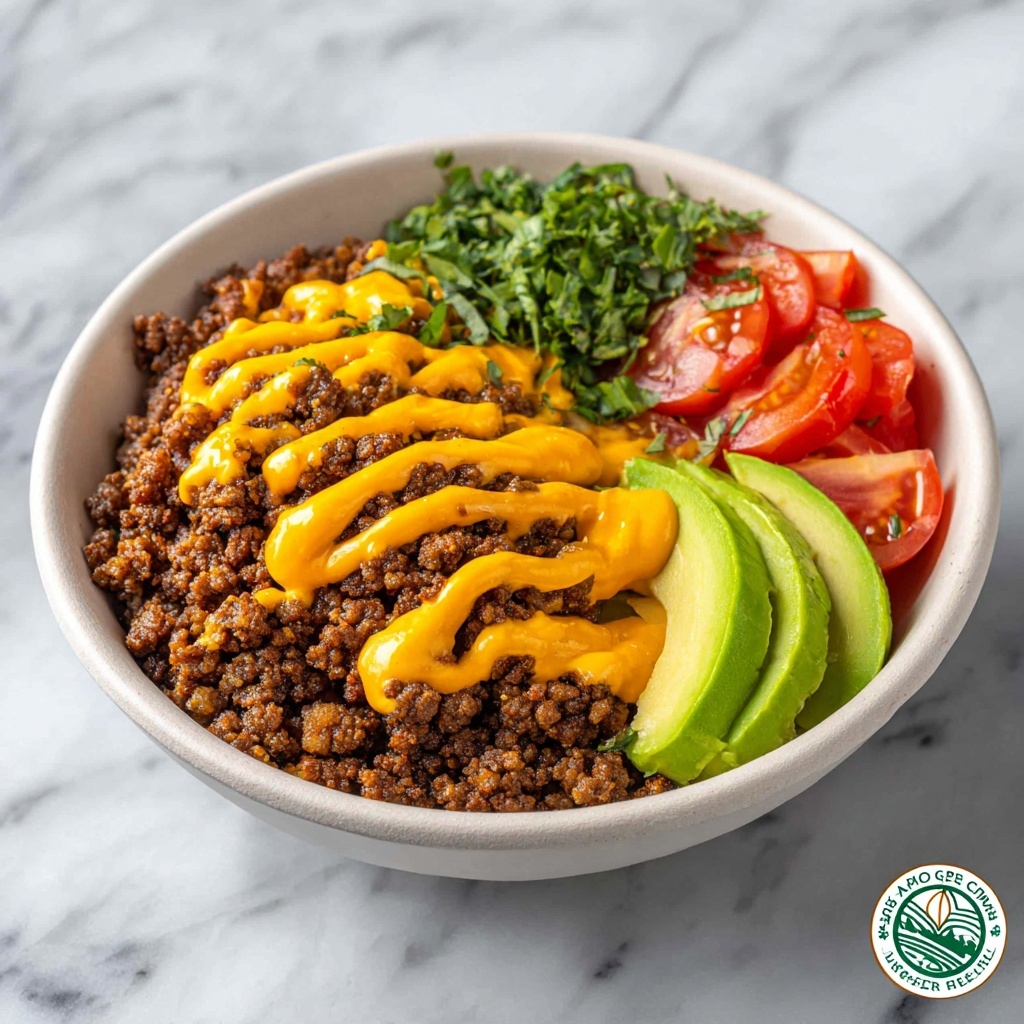
Step 4: Assemble the Bowls
To build your bowl, layer your chosen base first—whether it’s crisp lettuce or warm grains. Spoon a generous portion of the cooked, seasoned meat on top, then add your slices of tomato, pickle, and onion. Sprinkle with shredded cheese so it melts slightly atop the warm meat. Drizzle the prepared sauce over everything for that signature cheeseburger flavor burst.
Step 5: Add Your Finishing Touches
For extra indulgence and protein, add a fried egg on top or crispy cooked bacon strips. If you want a little heat, scatter some jalapeño slices over the bowl. Each finishing touch adds delicious layers, making every bite utterly satisfying.
How to Serve High-Protein Cheeseburger Bowls for Meal Prep Recipe
Garnishes
Fresh garnishes are key to bringing your High-Protein Cheeseburger Bowls for Meal Prep Recipe to life. Try sprinkling chopped fresh parsley or chives for a pop of color and brightness. A squeeze of fresh lemon juice over the avocado slices can elevate their flavor and prevent browning. Adding pickled jalapeños or extra dill pickle slices can boost that tangy crunch that really makes this bowl sing.
Side Dishes
This dish is hearty enough to stand on its own, but if you want to round out the meal, crisp roasted sweet potato fries or a simple side salad with a light vinaigrette make perfect companions. If you prefer to keep it low-carb, roasted or steamed green beans tossed with a bit of garlic butter are fantastic. These sides add complementary textures and flavors without overshadowing the bowl.
Creative Ways to Present
For meal prep or casual meals, you can serve these bowls in mason jars layered for grab-and-go convenience or spoon them into shallow meal prep containers for reheating. You can even turn them into a lettuce wrap by scooping the ingredients into large romaine leaves for a handheld option. Get creative with stacking colors and textures so each bowl looks as incredible as it tastes.
Make Ahead and Storage
Storing Leftovers
You can store your High-Protein Cheeseburger Bowls for Meal Prep Recipe in airtight containers in the refrigerator for up to 3-4 days. Keep the sauce separate if possible to maintain freshness and prevent the veggies from getting soggy. This way, every serving tastes just as vibrant as the first time you made it.
Freezing
While this bowl is fantastic fresh, you can freeze the cooked meat portion alone for up to 3 months. Freeze it in portion-sized containers or freezer bags. When you’re ready to eat, thaw overnight in the fridge before reheating. Avoid freezing the fresh vegetables and dairy-based sauce as their textures may suffer.
Reheating
Reheat your stored bowls in the microwave on medium heat, uncovered, in 1-minute increments until hot. If you kept the sauce separate, add it after reheating to keep it fresh and creamy. Fried eggs are best enjoyed freshly cooked, but you can add a quick pan-fried egg on top before serving for that perfect finish.
FAQs
Can I use ground chicken instead of beef or turkey?
Absolutely! Ground chicken works wonderfully and keeps the protein high while offering a lighter flavor. Just season it the same way to maintain that delicious cheeseburger taste.
Is there a vegan alternative for this recipe?
Yes, you can swap the ground meat for a lentil-walnut mixture for a plant-based “meat,” use dairy-free cheese, and replace bacon with smoked tempeh or coconut bacon for a smoky crunch. The rest of the veggies and sauce work beautifully vegan.
What if I don’t like spicy food—should I skip the jalapeños?
If heat isn’t your thing, simply leave out the jalapeños. The bowl will still be packed with flavor from the seasoned meat, tangy pickles, and creamy sauce.
Can I make this recipe gluten-free?
Yes, it’s naturally gluten-free as is, but double-check your ketchup and mustard labels to ensure they contain no hidden gluten.
How can I make this recipe lower in carbs?
Use cauliflower rice as your base and opt for sugar-free ketchup to keep the carbs low while still enjoying all the flavors of the High-Protein Cheeseburger Bowls for Meal Prep Recipe.
Final Thoughts
This High-Protein Cheeseburger Bowls for Meal Prep Recipe is honestly a game changer for anyone who loves classic burger flavors but wants a nutritious, easy-to-make bowl that holds up well throughout the week. It’s packed with protein, fresh veggies, and comforting cheesy goodness that hits the spot every time. Give it a try—you’ll wonder how you ever meal prepped without it!
“`
Print
High-Protein Cheeseburger Bowls for Meal Prep Recipe
- Prep Time: 10 minutes
- Cook Time: 15 minutes
- Total Time: 25 minutes
- Yield: 4 servings
- Category: Main Course
- Method: Stovetop
- Cuisine: American
- Diet: Low Fat
Description
These Irresistible High-Protein Cheeseburger Bowls are a delicious and nutritious meal prep option packed with lean ground beef or turkey, fresh veggies, and a tangy yogurt-based sauce. Perfectly seasoned and customizable with optional toppings like avocado, crispy bacon, and fried eggs, they offer a satisfying low-carb alternative to classic cheeseburgers.
Ingredients
Protein Base
- 1 lb lean ground beef or turkey (90% lean) (Or ground chicken or lentil-walnut ‘meat’ for vegan option)
- Salt, to taste
- Pepper, to taste
- Garlic powder, to taste
- Onion powder, to taste
Base & Vegetables
- 4 cups chopped lettuce (Or 2 cups cooked quinoa, brown rice, or cauliflower rice)
- 1 cup cherry tomatoes, halved
- 1/2 cup sliced dill pickles
- 1/2 medium red onion, thinly sliced (Replace with cucumbers if desired)
- 1 medium avocado, sliced (optional)
- Jalapeño slices (optional, for a spicy kick)
Toppings & Extras
- 1 cup shredded cheddar or American cheese (Dairy-free cheese for vegan option)
- 4 strips cooked bacon (optional)
- 4 medium fried eggs (optional protein boost)
Sauce
- 1/2 cup low-fat Greek yogurt
- 1 tbsp mustard
- 1 tbsp ketchup (Consider sugar-free for lower carbs)
- 1/2 tsp garlic powder
- 1/2 tsp paprika
- Salt and pepper, to taste
Instructions
- Brown the Meat: Heat a large skillet over medium heat and add the lean ground beef or turkey. Season with salt, pepper, garlic powder, and onion powder. Cook for 8–10 minutes, stirring occasionally, until fully cooked and browned. Drain any excess fat.
- Prepare the Base: While the meat cooks, chop the lettuce or prepare your chosen grain base as per package instructions. If using cauliflower rice, sauté it in a pan until tender.
- Prepare Veggies and Toppings: Slice the cherry tomatoes in half, slice the dill pickles, and thinly slice the red onion. Prepare optional toppings like sliced avocado, jalapeño slices, and cooked bacon strips.
- Make the Sauce: In a bowl, whisk together the low-fat Greek yogurt, mustard, ketchup, garlic powder, paprika, salt, and pepper until smooth and well combined.
- Assemble the Bowls: Layer your base (lettuce or grains) in individual bowls. Add a generous scoop of the cooked meat on top, then layer with sliced veggies, cheese, and drizzle with the prepared sauce.
- Add Optional Protein Boosts: For extra flavor and protein, top each bowl with a fried egg and/or crispy bacon strips if desired.
Notes
- You can substitute ground beef with ground turkey, chicken, or a plant-based lentil-walnut mix for a vegan option.
- Use dairy-free cheese and omit eggs and bacon to make this recipe fully vegan.
- Consider using sugar-free ketchup to reduce carbohydrate content.
- This recipe is versatile—swap lettuce for cooked quinoa, brown rice, or cauliflower rice according to preference or dietary needs.
- Jalapeño slices add heat; adjust or omit based on your spice tolerance.
- Store components separately in meal prep containers to maintain freshness.