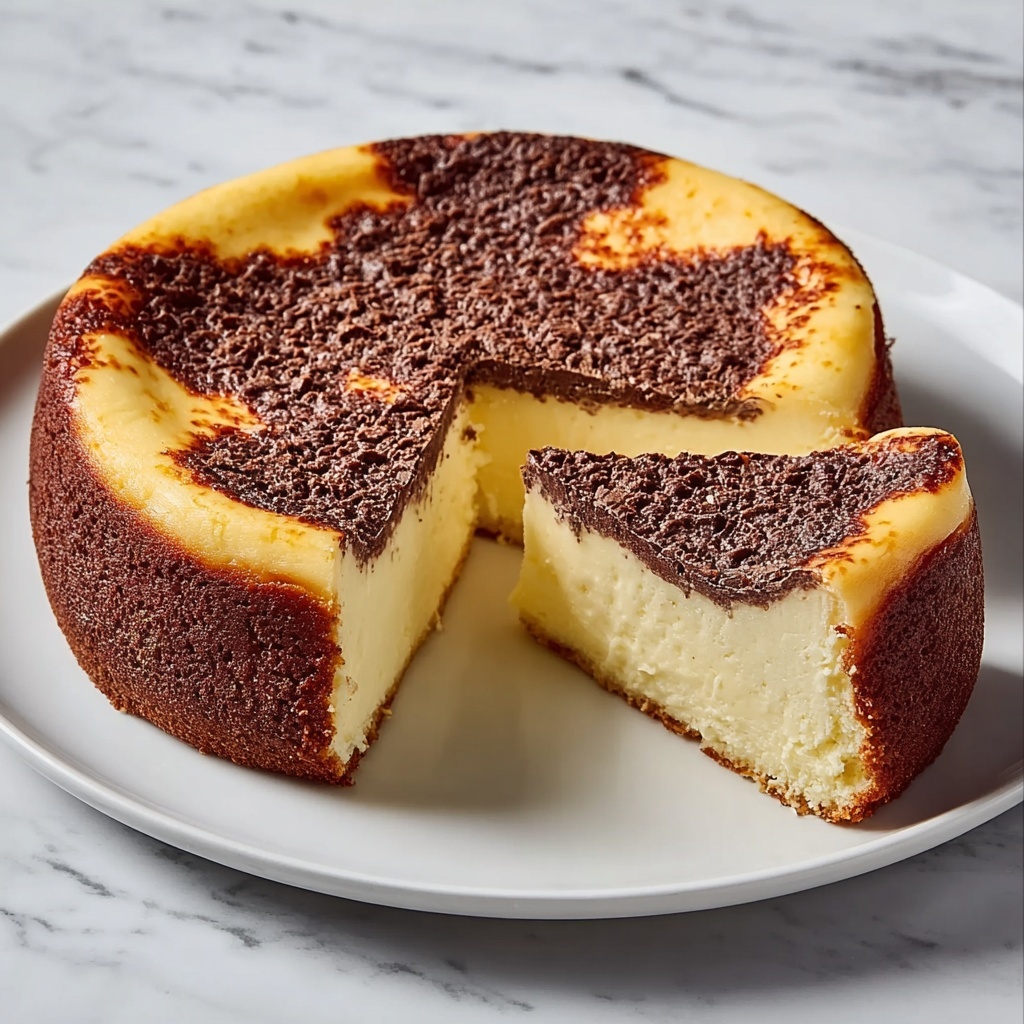
If you are looking for a dessert that masterfully combines simplicity with decadence, the Burnt Basque Cheesecake: A Creamy Delight Recipe is your ideal match. This cheesecake stands out with its uniquely caramelized top and a lusciously creamy interior that practically melts in your mouth. Originating from the Basque region in Spain, this dessert brings a rustic charm and an irresistible burnt flavor that highlights the delicate sweetness inside, making every bite a celebration of textures and tastes. Whether you’re a cheesecake aficionado or a daring foodie eager to try something new, this recipe promises a delightful, soulful treat that feels both sophisticated and wonderfully homey.
Ingredients You’ll Need
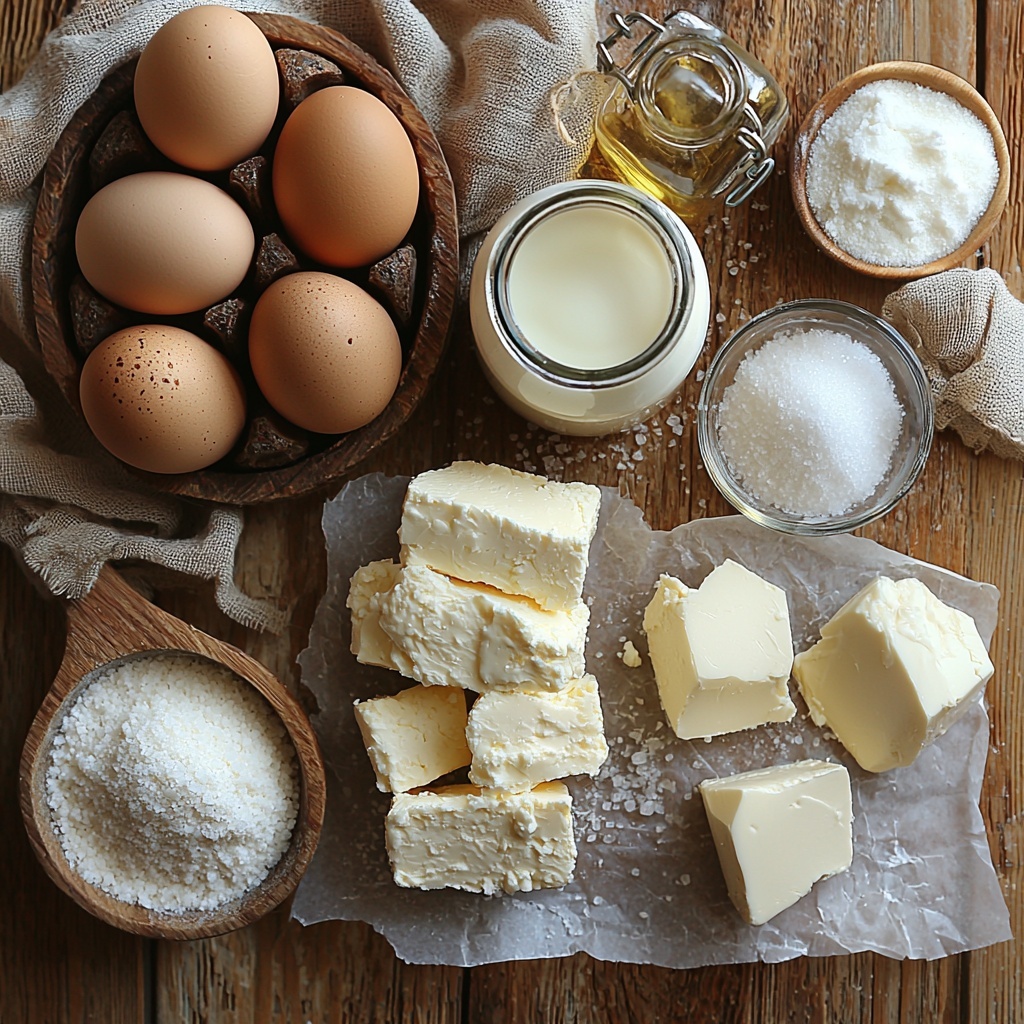
The magic of this Burnt Basque Cheesecake: A Creamy Delight Recipe lies in its few yet carefully chosen ingredients. Each one plays a vital role in crafting the perfect balance between creaminess and structure, while the minimal additions keep the spotlight on the rich, tangy cream cheese flavor.
- 2 lbs cream cheese: Softened to room temperature for a smooth base that ensures a creamy texture.
- 1 cup granulated sugar: Adds just the right level of sweetness without overpowering the cheese.
- 1 teaspoon vanilla extract: Provides a subtle pop of warm flavor to uplift the cheesecake.
- 1/4 teaspoon salt: Enhances the overall flavors and balances the sweetness beautifully.
- 4 large eggs: Essential for binding the ingredients and creating the custardy consistency.
- 1 cup heavy cream: Adds richness and a silky mouthfeel that makes the cheesecake decadent.
- 1 tablespoon all-purpose flour (optional): Helps to stabilize the cheesecake, especially useful if you prefer a slightly firmer texture.
How to Make Burnt Basque Cheesecake: A Creamy Delight Recipe
Step 1: Preheat Your Oven
Before you dive into mixing your ingredients, get your oven preheated to 400°F (200°C). This high temperature is the secret behind that signature deeply browned, almost burnt top which contrasts beautifully with the creamy interior.
Step 2: Prepare Your Pan
Grab a 9-inch springform pan and line it generously with parchment paper, making sure the paper extends above the rim. This technique ensures your cheesecake will come out easily after baking and keeps the edges rustic and natural.
Step 3: Beat the Cream Cheese
Using an electric mixer on medium speed, beat 2 lbs of softened cream cheese for 2-3 minutes. This step is crucial to achieving the silky texture—no lumps, just pure creamy goodness.
Step 4: Sweeten and Flavor
Add 1 cup of granulated sugar, 1 teaspoon vanilla extract, and 1/4 teaspoon salt into the cream cheese and mix until everything is fully combined. This step balances flavors and begins building the decadent base of your cheesecake.
Step 5: Add Eggs One at a Time
Incorporate 4 large eggs, adding them slowly and mixing well after each to ensure a smooth, homogenous batter. This gentle process helps prevent cracks during baking and maintains a lovely creaminess.
Step 6: Pour in the Heavy Cream
Pour 1 cup of heavy cream into the mix, stirring until the batter is silky and smooth. The cream contributes to the rich texture that this cheesecake is known for.
Step 7: Add Flour if Using
For an optional touch of stability, add 1 tablespoon of all-purpose flour and mix just until combined. This step is perfect if you want your cheesecake to hold a bit more shape without sacrificing softness.
Step 8: Transfer Batter to Pan
Pour the luscious cheesecake batter into your prepared pan, spreading it out evenly. The parchment paper will keep the cheesecake from sticking and ensure a flawless removal later.
Step 9: Bake to Perfection
Bake your cheesecake in the hot oven for 50 minutes. Look for a surface that’s deeply browned and almost burnt-looking on top—that signature hint of caramelization. The center should still have a slight wobble, promising that creamy texture after cooling.
Step 10: Cool at Room Temperature
Once baked, let the cheesecake sit in the pan for about 30 minutes at room temperature. This gradual cooling helps it firm up nicely without shocks that could crack the surface.
Step 11: Chill in the Refrigerator
Refrigerate the cheesecake for at least 2 hours or preferably overnight. Chilling sets the creamy center and intensifies the flavors, making the dessert even more irresistible.
Step 12: Remove and Slice
Carefully lift the cheesecake out of the pan using the overhanging parchment paper. Slice it gently to reveal the luscious interior, then serve chilled to enjoy the full dreamy texture.
How to Serve Burnt Basque Cheesecake: A Creamy Delight Recipe
Garnishes
The beauty of the Burnt Basque Cheesecake: A Creamy Delight Recipe is that it doesn’t need much to shine. A simple dusting of powdered sugar or a handful of fresh berries can elevate the look and taste without overwhelming the natural caramelized flavor.
Side Dishes
Pair this cheesecake with light accompaniments such as a dollop of whipped cream, a drizzle of honey, or a tangy berry compote. These sides complement the rich creaminess perfectly and add a refreshing contrast.
Creative Ways to Present
For special occasions, consider serving individual slices with edible flowers or alongside a scoop of vanilla bean ice cream. The contrast of hot and cold with the burnt top and creamy center creates a delightful sensory experience that will wow your guests.
Make Ahead and Storage
Storing Leftovers
Store leftovers of your Burnt Basque Cheesecake: A Creamy Delight Recipe tightly wrapped in plastic wrap or in an airtight container in the fridge. It keeps well for up to 4 days, maintaining its smooth texture and rich flavor.
Freezing
Although it’s best enjoyed fresh, this cheesecake can be frozen. Wrap it carefully in plastic wrap and foil to avoid freezer burn, and freeze for up to 1 month. Thaw it overnight in the fridge before serving.
Reheating
If you prefer a slightly warm cheesecake, gently reheat slices in a low-temperature oven (about 300°F or 150°C) for 10 minutes. This will soften the cheesecake while preserving its signature burnt crust.
FAQs
What makes Burnt Basque Cheesecake different from other cheesecakes?
Unlike traditional cheesecakes, the Burnt Basque Cheesecake features a deeply caramelized, almost burnt top and edges, with a creamy, custardy center. It has no crust, which allows its unique texture and flavor to really stand out.
Can I use low-fat cream cheese or cream for this recipe?
For the best texture and richness, it’s recommended to use full-fat cream cheese and heavy cream. Low-fat versions may affect the creaminess and the baking process, resulting in a less indulgent cheesecake.
Do I have to use the optional flour in the recipe?
The flour helps stabilize the cheesecake slightly, but it’s not essential. The recipe will work beautifully without it, especially if you enjoy a more custard-like texture.
Why is the top of the cheesecake burnt?
The burnt top is intentional and contributes to the unique flavor of the Burnt Basque Cheesecake: A Creamy Delight Recipe. The high oven temperature caramelizes the sugars, creating a beautiful contrast with the creamy interior.
Can I make this cheesecake without a springform pan?
A springform pan is ideal because it allows for easy removal of the cheesecake without damaging its delicate edges. If you don’t have one, consider using a cake pan lined with parchment paper that extends beyond the sides to lift the cheesecake out smoothly.
Final Thoughts
There’s something truly special about the Burnt Basque Cheesecake: A Creamy Delight Recipe that invites you to savor every bite of its caramelized crust and silky interior. It’s a dessert that feels both approachable and sophisticated, perfect for impressing friends or treating yourself after a long day. Give this recipe a try and let its rich, creamy richness become one of your favorite indulgences.
Print
Burnt Basque Cheesecake: A Creamy Delight Recipe
- Prep Time: 15 minutes
- Cook Time: 50 minutes
- Total Time: 3 hours 35 minutes
- Yield: 8 to 10 servings
- Category: Dessert
- Method: Baking
- Cuisine: Spanish
Description
This Burnt Basque Cheesecake is a creamy, rich, and indulgent dessert characterized by its deeply browned, almost caramelized top and a luscious, slightly jiggly center. With a simple list of ingredients and straightforward baking instructions, it’s a perfect cheesecake for those craving a sophisticated, no-fuss dessert that combines cream cheese, heavy cream, and a subtle hint of vanilla.
Ingredients
Cheesecake Base
- 2 lbs (900g) cream cheese, softened
- 1 cup granulated sugar
- 1 teaspoon vanilla extract
- 1/4 teaspoon salt
- 4 large eggs
- 1 cup heavy cream
- 1 tablespoon all-purpose flour (optional)
Instructions
- Preheat Oven: Preheat your oven to 400°F (200°C) to prepare for baking the cheesecake.
- Line the Pan: Line a 9-inch (23 cm) springform pan with parchment paper, making sure the paper extends above the pan edges for easy removal after baking.
- Beat the Cream Cheese: Using an electric mixer on medium speed, beat the softened cream cheese for about 2 to 3 minutes until smooth and creamy.
- Add Sugar and Vanilla: Gradually add granulated sugar, vanilla extract, and salt to the cream cheese mixture. Mix until everything is well combined.
- Incorporate Eggs: Add the eggs one at a time, mixing thoroughly after each addition to ensure a uniform batter.
- Add Heavy Cream: Pour in the heavy cream and continue mixing until the batter is smooth and creamy.
- Add Flour (Optional): If using, add the tablespoon of all-purpose flour and mix just until fully incorporated to add stability to the cheesecake.
- Pour Batter into Pan: Pour the smooth cheesecake batter into the prepared springform pan, spreading evenly.
- Bake: Bake in the preheated oven for 50 minutes, or until the top is deeply browned and the center is just set but still slightly jiggly.
- Remove from Oven: Take the cheesecake out of the oven and let it cool in the pan at room temperature for about 30 minutes.
- Chill: Transfer the cheesecake to the refrigerator and chill for at least 2 hours or preferably overnight to enhance flavor and firmness.
- Remove from Pan: Carefully lift the cheesecake out of the pan using the overhanging parchment paper.
- Slice and Enjoy: Slice the chilled cheesecake and serve, savoring its creamy texture and rich, caramelized flavor.
Notes
- Use full-fat cream cheese for a richer texture and flavor.
- Do not overmix once the eggs are added to avoid incorporating too much air.
- Allow the cheesecake to cool completely before chilling to prevent cracking.
- The burnt top is essential and adds a unique caramelized flavor; do not be alarmed if it looks darker than traditional cheesecakes.
- For best results, chill overnight to develop the best texture and flavor.
- The optional flour adds stability but can be omitted for a creamier result.


