
“`html
If you’re on the hunt for a dessert that’s both stunning and absolutely delicious, this Red Velvet Cupcakes Recipe will steal your heart. These cupcakes are delightfully tender, boasting that signature rich red hue paired with a subtle cocoa flavor, topped off with luscious cream cheese frosting. Their perfect balance of moist texture and sweet tang is guaranteed to impress both family and friends, making them an irresistible treat for any occasion.
Ingredients You’ll Need
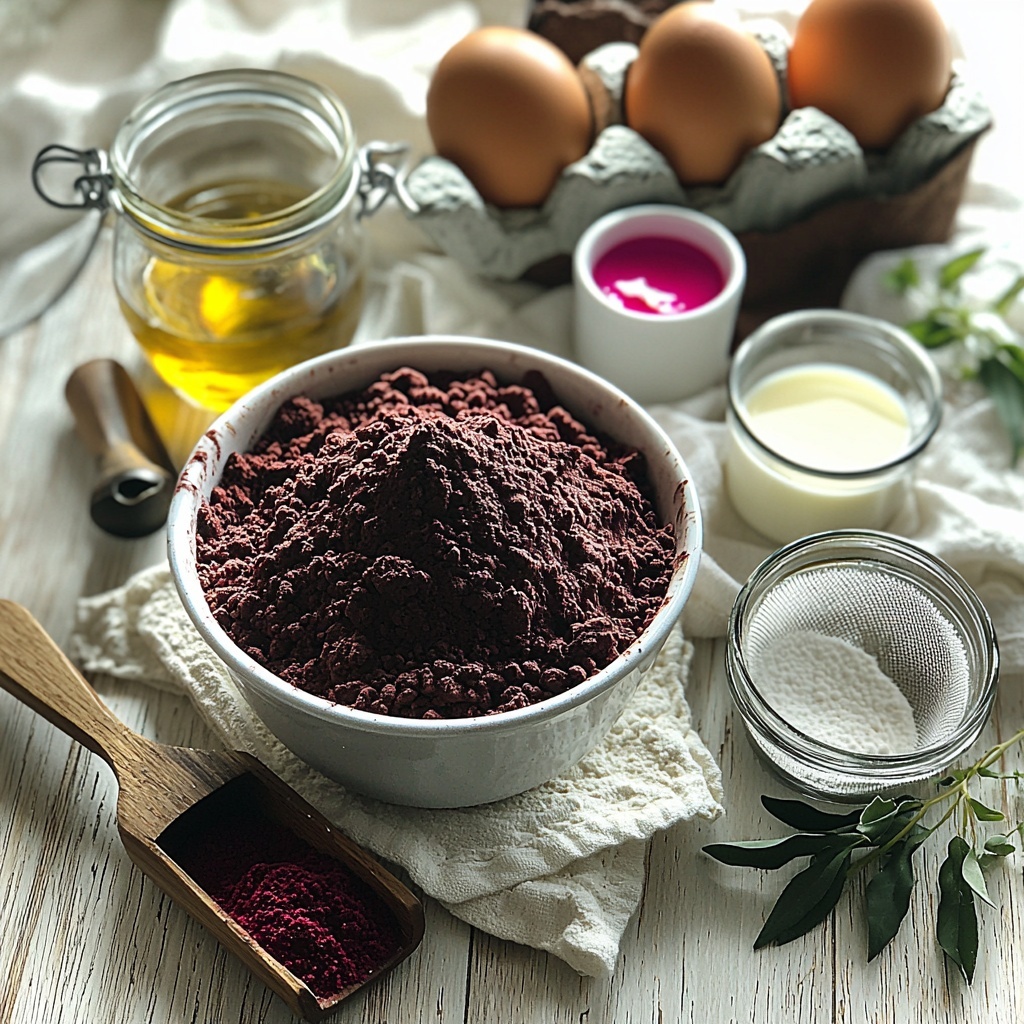
Gathering just the right ingredients is the secret to making your Red Velvet Cupcakes Recipe shine. Each component plays a crucial role, from the cake flour ensuring a delicate crumb to the red gel food coloring providing that iconic vibrant tint.
- 2 1/2 cups cake flour, sifted: Provides a light, tender crumb essential for soft cupcakes.
- 1 tsp salt: Enhances all the flavors for a perfectly balanced taste.
- 2 tbsp cocoa powder: Adds a subtle chocolate undertone without overpowering the red velvet character.
- 1 1/2 cups sugar: Sweetens the batter and helps with moisture retention.
- 1 1/2 cups vegetable oil: Keeps cupcakes moist and tender throughout.
- 2 large eggs: Acts as a binder and provides structure to the cake.
- 1 tsp vanilla extract: Adds softness and depth to the flavor profile.
- 1 tsp red gel food coloring (add more for deeper red color): Gives the cupcakes their signature, eye-catching color.
- 1 cup buttermilk: Contributes tanginess and helps activate the leavening for a fluffy texture.
- 2 tsp vinegar: Reacts with baking soda for lift and enhances the slight tang typical of red velvet.
- 1 1/2 tsp baking soda: Creates rise and lightness, working perfectly with vinegar.
How to Make Red Velvet Cupcakes Recipe
Step 1: Preheat Oven & Prepare Pan
Begin by warming your oven to 350°F (175°C) and lining a standard muffin tin with 24 paper liners. This sets the stage perfectly, so your cupcakes bake evenly and come out effortlessly.
Step 2: Combine Dry Ingredients
In a medium bowl, whisk together the sifted cake flour, cocoa powder, and salt until well incorporated. This dry mix delivers the foundation of your cupcakes’ texture and flavor.
Step 3: Mix Sugar and Oil
Using an electric mixer in a large bowl, blend the sugar and vegetable oil until the mixture looks smooth and unified. This combination ensures moistness and sweetness in every bite.
Step 4: Add Eggs
Incorporate the eggs one at a time, gently mixing just until combined after each addition. This careful approach prevents overmixing, keeping your cupcakes tender and airy.
Step 5: Incorporate Flavor & Color
Add the vanilla extract and red gel food coloring to your wet mixture. Mix slowly until the color is even throughout. If you prefer an even more vivid red, feel free to add a little extra coloring here.
Step 6: Alternate Dry & Wet Ingredients
Slowly add the flour mixture and buttermilk alternately to the wet ingredients in three batches, starting and finishing with the flour. Mix between each addition but take care not to overwork the batter to keep your cupcakes light and tender.
Step 7: Add Leavening Mixture
In a small bowl, stir together the vinegar and baking soda, noticing it fizz immediately—this magic reaction helps your cupcakes rise beautifully. Fold this mixture gently into the batter until just combined.
Step 8: Fill Cupcake Liners
Distribute the batter evenly among the 24 paper liners using an ice cream scoop or spoon, filling each about two-thirds full to allow room for rising without spilling.
Step 9: Bake
Bake for 18 minutes, rotating the pan halfway through to ensure even cooking. Check doneness by inserting a toothpick into a center cupcake; it should come out clean when they’re ready.
Step 10: Cool
After baking, let the cupcakes rest in the pan for a few minutes before transferring them to a wire rack to cool completely. This step is crucial before frosting to prevent melting or sliding.
Step 11: Frost and Decorate
Once the cupcakes are completely cooled, frost them generously with cream cheese frosting. You can also get creative by decorating with fondant flowers, hearts, or even red velvet crumbs for extra visual appeal, or enjoy them simply plain—you really can’t go wrong!
How to Serve Red Velvet Cupcakes Recipe
Garnishes
Think outside the box by adding garnishes like chocolate shavings, edible glitter, or fresh berries. These small touches elevate the presentation and add interesting textures that complement the cupcakes’ richness.
Side Dishes
Serve these cupcakes alongside a hot cup of coffee, chai tea, or even a chilled glass of milk. The creamy drinks balance the sweetness and enhance the overall tasting experience.
Creative Ways to Present
For parties or special gatherings, arrange your Red Velvet Cupcakes Recipe on tiered cake stands or decorate small cupcake boxes for guests to take home. Wrapping them with colorful ribbons adds an extra layer of charm nobody will forget.
Make Ahead and Storage
Storing Leftovers
Keep your leftover cupcakes fresh by storing them in an airtight container in the refrigerator for 3 to 4 days. This prevents the delicate texture from drying out and preserves the vibrant flavor.
Freezing
If you want to save cupcakes for later, wrap each one tightly in plastic wrap and place them in a freezer-safe container. They freeze well for up to 3 months. When ready, thaw overnight in the fridge for best results.
Reheating
To bring refrigerated or thawed cupcakes back to life, let them come to room temperature for about 30 minutes. You can also warm them gently in the microwave for 10-15 seconds but be careful not to melt the frosting.
FAQs
Can I use regular flour instead of cake flour in this Red Velvet Cupcakes Recipe?
While you can, cake flour is preferred because it produces a softer, more delicate crumb. If using regular flour, consider removing 2 tablespoons per cup and replacing that with cornstarch for better texture.
Is red gel food coloring necessary?
The red gel food coloring gives these cupcakes their iconic color. While natural alternatives exist, gel coloring provides that vibrant hue without adding too much liquid, which could alter batter consistency.
Can I make these cupcakes dairy-free?
You can substitute buttermilk with a plant-based milk plus a teaspoon of lemon juice or vinegar, and use dairy-free cream cheese for frosting to keep these cupcakes dairy-free while retaining their moisture and tang.
Why do vinegar and baking soda need to be added separately?
The vinegar and baking soda react immediately to create carbon dioxide bubbles that help your cupcakes rise. Adding them together right before baking maximizes this effect for the best texture.
How do I prevent the frosting from sliding off the cupcakes?
Make sure the cupcakes are fully cooled before frosting. If the frosting is too soft, chill it for a few minutes to firm up or refrigerate the frosted cupcakes briefly to help set the frosting in place.
Final Thoughts
There really is nothing quite as joyful as making and sharing a batch of these Red Velvet Cupcakes Recipe. Their vibrant color, tender crumb, and luscious cream cheese frosting bring smiles every time. I encourage you to give this recipe a try—once you do, you’ll see why it’s become a timeless favorite in so many kitchens, including mine!
“`
Print
Red Velvet Cupcakes Recipe
- Prep Time: 15 minutes
- Cook Time: 23 minutes
- Total Time: 38 minutes
- Yield: 24 cupcakes
- Category: Dessert
- Method: Baking
- Cuisine: American
Description
Classic Red Velvet Cupcakes featuring a moist, tender crumb with a rich red hue and a subtle cocoa flavor, topped with smooth and creamy cream cheese frosting. Perfect for celebrations or a delightful treat.
Ingredients
Dry Ingredients
- 2 1/2 cups cake flour, sifted
- 1 tsp salt
- 2 tbsp cocoa powder
- 1 1/2 tsp baking soda
Wet Ingredients
- 1 1/2 cups sugar
- 1 1/2 cups vegetable oil
- 2 large eggs
- 1 tsp vanilla extract
- 1 tsp red gel food coloring (add more for deeper red color)
- 1 cup buttermilk
- 2 tsp vinegar
Instructions
- Preheat Oven & Prepare Pan: Preheat your oven to 350°F (175°C). Line a standard muffin tin with 24 paper liners to prevent sticking and ensure easy removal of cupcakes.
- Combine Dry Ingredients: In a medium bowl, whisk together the sifted cake flour, cocoa powder, and salt until evenly combined to ensure uniform distribution of ingredients.
- Mix Sugar and Oil: In a large bowl, use an electric mixer to blend the sugar and vegetable oil until the mixture is smooth and well combined, creating a moist base for the cupcakes.
- Add Eggs: Add the eggs one at a time to the sugar and oil mixture, mixing gently after each addition just until combined to maintain a light texture.
- Incorporate Flavor & Color: Mix in the vanilla extract and red gel food coloring slowly until the color is evenly distributed throughout the batter. Add more coloring if a deeper red shade is desired for the signature red velvet look.
- Alternate Dry & Wet Ingredients: Alternately add the flour mixture and buttermilk to the wet ingredients in three batches, starting and ending with the flour mixture. Mix well between each addition but avoid overmixing to keep the cupcakes tender and fluffy.
- Add Leavening Mixture: Stir together the vinegar and baking soda in a small bowl until it fizzes. Immediately add this mixture to the batter and mix just until combined. This reaction helps the cupcakes rise and stay light.
- Fill Cupcake Liners: Use an ice cream scoop or spoon to evenly divide the batter among the 24 muffin cups, filling each about two-thirds full to allow room for rising.
- Bake: Bake in the preheated oven for about 18 minutes. Rotate the muffin tin halfway through baking to ensure even cooking. Check doneness by inserting a toothpick into the center – it should come out clean.
- Cool: Allow the cupcakes to cool in the pan for a few minutes, then transfer to wire racks to cool completely before frosting to prevent melting and sliding of the frosting.
- Frost and Decorate: Once fully cooled, frost generously with cream cheese frosting. Optionally, decorate with fondant flowers, hearts, red velvet cake crumbs, or enjoy plain for a classic taste.
Notes
- For a richer red color, increase the amount of red gel food coloring slightly.
- Ensure not to overmix the batter after adding the flour to keep cupcakes tender.
- Use room temperature eggs for better emulsion and texture.
- Let cupcakes cool completely before frosting to avoid melting the frosting.
- These cupcakes freeze well; wrap tightly and freeze for up to 2 months.

