“`html
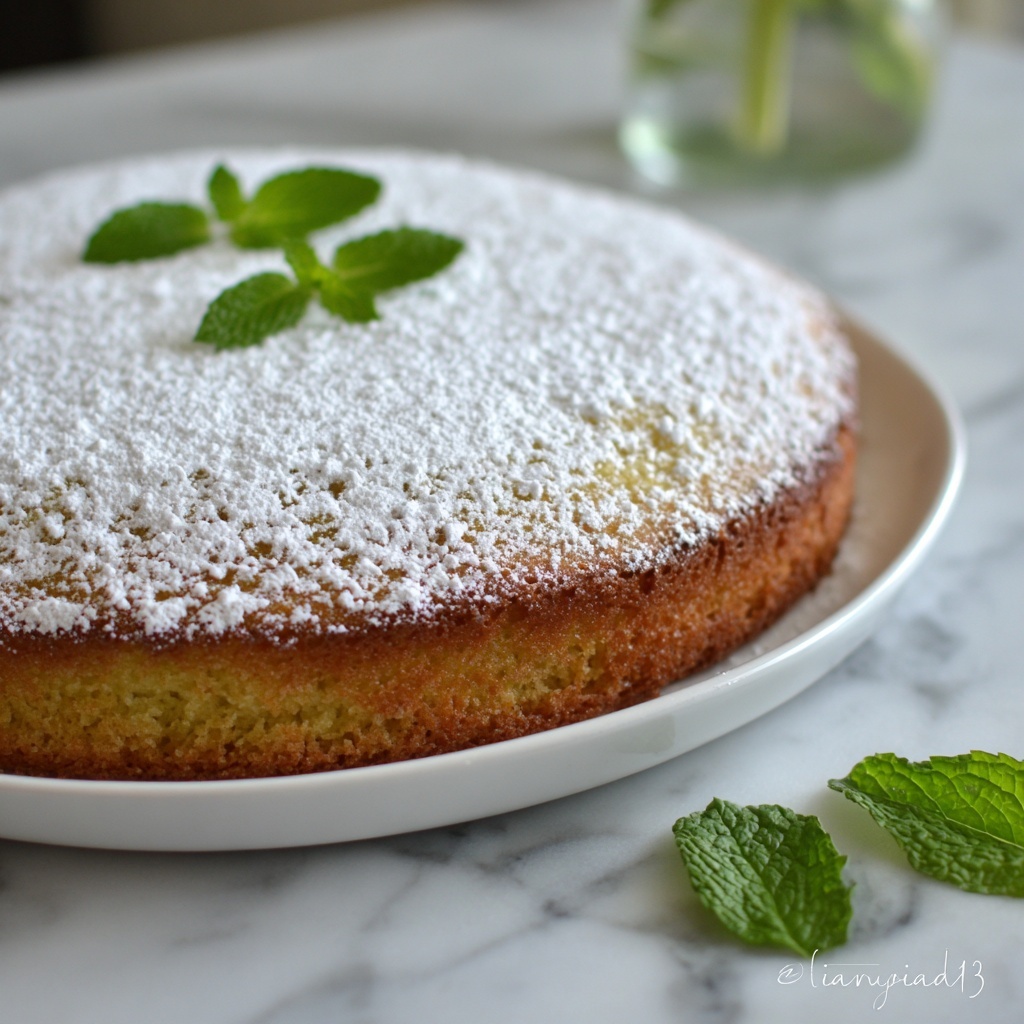
If you have a soft spot for delicate desserts that feel like a cloud melting on your tongue, you are going to adore this Authentic Japanese Cotton Cheesecake: Fluffy & Light Recipe. It’s a dreamy fusion of cheesecake richness and airy sponge, born out of simple, carefully balanced ingredients and some thoughtful baking techniques. This cheesecake is delightfully light yet flavorful, offering a subtle sweetness and a rare fluffiness that only this style can achieve. Once you try it, you’ll understand why it’s beloved around the world and why it deserves a spot in your dessert repertoire.
Ingredients You’ll Need
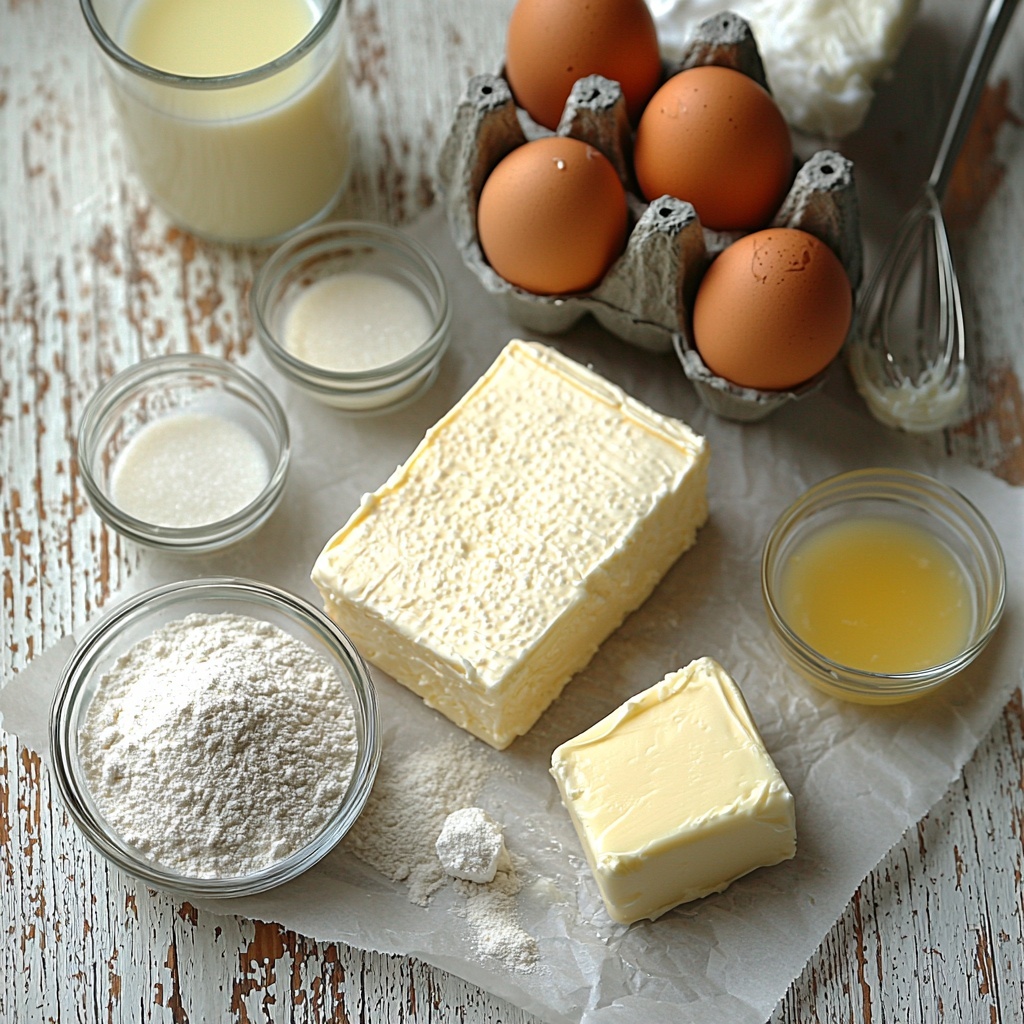
This Authentic Japanese Cotton Cheesecake: Fluffy & Light Recipe uses uncomplicated ingredients that work harmoniously to create that signature texture and taste. Each ingredient plays a vital role—from the cream cheese for creaminess to the egg whites for that signature fluffy lift.
- 8 oz full-fat cream cheese: Brings the cheesecake’s rich and creamy foundation; room temperature ensures smooth mixing.
- 4 large eggs, separated into yolks and whites: Yolks add richness while whites are whipped for lightness.
- 1/2 cup whole milk: Adds moisture and a gentle creaminess to the batter.
- 1/4 cup unsalted butter: Either room temperature or gently melted to blend easily with the cream cheese.
- 1 cup cake flour: Provides structure without heaviness, essential for the soft texture.
- 3/4 cup granulated sugar, divided: Sweetness balanced carefully and split between the batter and meringue.
- 1 tablespoon lemon juice or cream of tartar: Stabilizes the egg whites for a fluffy meringue.
How to Make Authentic Japanese Cotton Cheesecake: Fluffy & Light Recipe
Step 1: Prepare Your Pan
Begin by lining the bottom of an 8-inch springform pan with parchment paper and greasing the sides thoroughly; this makes sure your cheesecake releases beautifully after baking. Then, wrap the outside of the pan with two layers of heavy-duty aluminum foil to protect it during the water bath baking process—this is a crucial step for even cooking and preventing water from seeping in.
Step 2: Preheat Oven and Set Up Water Bath
Preheat your oven to 325°F (160°C). Meanwhile, fill a larger roasting pan with about an inch of hot water to create a gentle, moist heat environment during baking. The water bath ensures the cheesecake bakes slowly and evenly, achieving that perfect custardy texture without cracks.
Step 3: Melt Cream Cheese, Milk, and Butter
In a large heatproof bowl, combine the cream cheese, whole milk, and butter. Place this bowl over a pot of simmering water (a double boiler setup) and stir constantly until the mixture is smooth and fully melted. This step softens the cream cheese perfectly without lumps. Remove the bowl from heat and let it cool slightly so it doesn’t scramble the eggs when added.
Step 4: Incorporate Egg Yolks and Dry Ingredients
Whisk the egg yolks into the slightly cooled cream cheese mixture one at a time to ensure full incorporation. Next, sift in the cake flour along with a portion of the sugar, then whisk gently until the batter is just combined. Avoid overmixing here to keep the batter light and airy.
Step 5: Make a Stable Meringue
In a thoroughly clean bowl, beat the egg whites until foamy. Add the lemon juice or cream of tartar, then gradually beat in the remaining sugar until soft peaks form. This meringue is the secret to the cheesecake’s famous fluffy texture, so take your time beating it till it’s shiny and holds its shape.
Step 6: Fold Meringue into Batter
Gently fold one-third of the meringue into the cream cheese batter to lighten it, then carefully fold in the remaining meringue in two portions. Be gentle and slow to preserve the air bubbles, which help the cake rise and stay cloud-like during baking.
Step 7: Pour Batter and Bake in Water Bath
Pour the batter into your prepared pan, tapping gently on the counter to release any trapped air bubbles. Place the pan carefully into the roasting pan with hot water, then bake for 30 minutes at 325°F (160°C). This initial phase sets the structure without rushing the rise.
Step 8: Lower Oven Temperature and Continue Baking
Reduce the oven temperature to 285°F (140°C) and continue baking for an additional 60 to 70 minutes. The cake should develop a lovely golden-brown top with a slight jiggle in the center when gently shaken. This slow baking at lower heat is the final step in developing its ethereal texture and subtle flavor.
Step 9: Cool Cheesecake Gradually
Turn off the oven and prop the door open slightly. Let the cheesecake cool inside for at least one hour, allowing it to set gently without sudden temperature changes that can cause cracks. Once it has cooled somewhat, transfer it to a wire rack to cool completely.
Step 10: Chill Before Serving
After the cheesecake is completely cool, cover it with plastic wrap and refrigerate for at least 4 hours or overnight. Chilling helps the flavors meld and the texture firm up just enough while maintaining that iconic weightless fluffiness.
How to Serve Authentic Japanese Cotton Cheesecake: Fluffy & Light Recipe
Garnishes
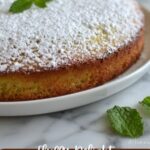
This cheesecake is already a star on its own, but a few delicate touches elevate it to a showstopper. Dust with powdered sugar for a soft snowy effect or add a handful of fresh berries like raspberries or blueberries to introduce a fresh, tart contrast that brightens every bite. Whipped cream or a drizzle of light honey pairs beautifully too, enhancing the subtle sweetness without overpowering the gentle flavors.
Side Dishes
Serve this masterpiece alongside a cup of green tea or a mild, fruity white wine to complement its airy texture and understated sweetness. Fresh fruit salads or a citrus compote also work well to add a juicy brightness that pairs perfectly with the cheesecake’s mellow flavor.
Creative Ways to Present
If you want to impress guests, consider serving each slice atop elegant dessert plates with a smear of berry coulis or a custard sauce swirl for added color and sophistication. Layering small portions with a thin layer of fresh fruit or edible flowers creates an Instagram-worthy presentation while preserving the cake’s delicate structure and appeal.
Make Ahead and Storage
Storing Leftovers
Leftover cheesecake should be stored airtight in the refrigerator and will stay fresh for 3 to 4 days. Keeping it well-covered prevents it from drying out or absorbing other fridge aromas, ensuring every bite remains as lovely as when first cut.
Freezing
You can freeze this cheesecake to enjoy later! Wrap it tightly in plastic wrap and then in aluminum foil to protect it from freezer burn. Frozen cheesecake is best consumed within 1 month to guarantee flavor and texture are preserved. Thaw slowly in the refrigerator overnight before serving.
Reheating
This delicate cheesecake is best enjoyed chilled or at room temperature rather than reheated. If you prefer it slightly warmer, allow it to come to room temperature naturally for about 30 minutes—avoid microwaving, which can ruin the fluffy texture.
FAQs
What makes this cheesecake different from traditional cheesecakes?
This Authentic Japanese Cotton Cheesecake: Fluffy & Light Recipe differs mainly in texture: it’s much lighter and airier due to the whipped egg whites folded into the batter, contrasting with the dense, creamy texture of classic cheesecakes.
Can I use low-fat cream cheese or milk?
For the best texture and flavor, it’s recommended to use full-fat cream cheese and whole milk. Lower-fat alternatives may result in a less creamy texture and can affect how well the cake sets.
Why is the water bath necessary?
The water bath provides gentle, moist heat during baking to prevent the cheesecake from cracking and drying out, ensuring it cooks evenly and achieves that delicate, creamy consistency.
How do I know when the cheesecake is done?
The cheesecake is done when the top is a light golden brown and the center jiggles slightly when shaken gently. This jiggle indicates it is perfectly set but still soft and fluffy inside.
Can I make this gluten-free?
To make a gluten-free version, substitute the cake flour with a gluten-free flour blend suitable for cakes. However, results may vary slightly in texture, so proceed with a tested blend or recipe variation.
Final Thoughts
Making this Authentic Japanese Cotton Cheesecake: Fluffy & Light Recipe is like inviting a little magic into your kitchen. The process is wonderfully rewarding, and the result is a dessert that feels like a hug in cake form—soft, tender, and sweet without being overpowering. Whether you’re treating yourself or sharing with loved ones, this cheesecake is sure to become a cherished favorite. Go ahead, give it a try, and watch your dessert game gracefully soar!
“`
Print
Authentic Japanese Cotton Cheesecake: Fluffy & Light Recipe
- Prep Time: 30 minutes
- Cook Time: 1 hour 40 minutes
- Total Time: 2 hours 10 minutes plus 4 hours chilling
- Yield: 8 servings
- Category: Dessert
- Method: Baking
- Cuisine: Japanese
Description
Experience the delicate delight of Authentic Japanese Cotton Cheesecake, a fluffy and light dessert that melts in your mouth. This cheesecake combines creamy full-fat cream cheese with airy meringue to create a soft, cloud-like texture. Baked in a water bath to ensure gentle cooking, it features a golden top with a slight jiggle in the center, offering a perfect balance of sweetness and softness. Ideal for special occasions or a luxurious treat, this recipe serves eight and requires a few hours of preparation and chilling for best results.
Ingredients
Cheesecake Batter
- 8 oz full-fat cream cheese, at room temperature
- 1/2 cup whole milk
- 1/4 cup unsalted butter, at room temperature or gently melted
- 4 large eggs, separated into yolks and whites
- 1 cup cake flour
- 3/4 cup granulated sugar, divided
- 1 tablespoon lemon juice or cream of tartar
Instructions
- Prepare Your Pan: Line the bottom of an 8-inch round springform pan with parchment paper and grease the sides thoroughly. Wrap the outside of the pan securely with two layers of heavy-duty aluminum foil to prevent water leakage during the water bath baking.
- Preheat Oven & Water Bath: Preheat your oven to 325°F (160°C). Fill a larger roasting pan with about an inch of hot water to create a gentle water bath for the cheesecake.
- Prepare the Cream Cheese Batter: In a large heatproof bowl, combine the cream cheese, whole milk, and unsalted butter. Place this bowl over a pot of simmering water and stir continuously until the mixture is smooth and melted. Remove from heat and allow it to cool slightly.
- Add Egg Yolks and Dry Ingredients: Whisk in the egg yolks one at a time into the cream cheese mixture. Sift in the cake flour and add a small portion of the sugar. Gently whisk until just combined, ensuring not to overmix.
- Make the Meringue: In a clean and dry bowl, beat the egg whites until they become foamy. Add the lemon juice or cream of tartar to stabilize the whites. Gradually add the remaining sugar while continuing to beat until soft peaks form, resulting in a glossy meringue.
- Fold the Meringue into the Batter: Gently fold one-third of the meringue into the cream cheese mixture to lighten it. Then, carefully fold in the remaining meringue in two additions until the batter is homogeneous without streaks, preserving as much air as possible.
- Pour and Bake: Pour the batter into the prepared springform pan and gently tap the pan on the countertop to release any trapped air bubbles. Place the pan into the roasting pan with hot water to create the water bath, and bake for 30 minutes at 325°F (160°C).
- Bake Slowly: Lower the oven temperature to 285°F (140°C) and continue baking for an additional 60-70 minutes. Bake until the cheesecake’s top is golden brown and the center has a slight jiggle when gently shaken.
- Cooling Process: Turn off the oven and prop the door open slightly to let the cheesecake cool gradually inside the oven for at least 1 hour. This prevents cracking and ensures a smooth texture. Then, remove the cheesecake and cool completely on a wire rack.
- Chill: Once the cheesecake is completely cooled, cover it tightly with plastic wrap and refrigerate for at least 4 hours or preferably overnight before serving to allow it to set and develop its signature fluffy texture.
Notes
- Using room temperature ingredients helps achieve a smooth batter.
- Wrapping the pan with foil is crucial to prevent water from seeping into the cheesecake during water bath baking.
- Folding the meringue gently preserves the airy texture essential to the Japanese cotton cheesecake.
- Cooling the cheesecake inside the oven with the door ajar reduces cracking by allowing gradual temperature changes.
- Chilling the cheesecake overnight enhances its flavor and texture.
- If cream of tartar is unavailable, lemon juice is an effective substitute to stabilize egg whites.
