
If you’re craving a dessert that combines rich chocolate and creamy peanut butter in the most delightful way, the Peanut Butter Brownie Cups Recipe is your new best friend. These bite-sized treats pack a punch with fudgy brownie goodness that nestles a luscious peanut butter center and melts topped with chocolate chips for that perfect balance of sweet and salty. Whether it’s a party, a cozy night in, or just because, these mini brownie cups will quickly become the dessert you want to make again and again.
Ingredients You’ll Need
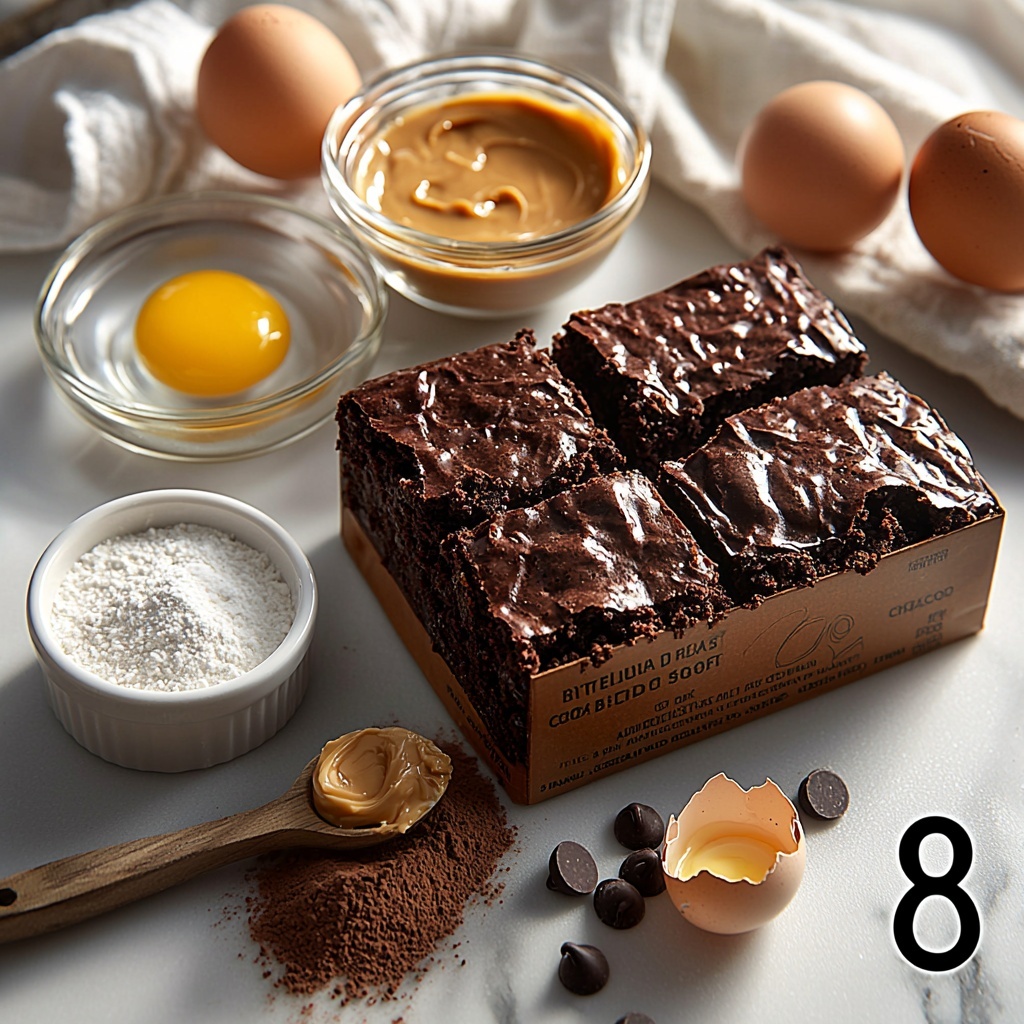
Gathering your ingredients for this peanut butter brownie cups recipe is a breeze since each one plays a crucial role in creating that ideal texture and flavor combination. From the deep chocolate base to the creamy peanut butter and gooey melty chips, every element works together in harmony.
- Brownie mix (or homemade equivalent): A simple shortcut that ensures moist, fudge-like brownies every time.
- Large eggs: These act as the binding agent to keep your brownies perfectly chewy and structured.
- Melted butter (if making from scratch): Adds richness and a tender crumb texture.
- All-purpose flour (for homemade): Provides the foundation for your homemade brownie batter.
- Granulated sugar (for homemade): Sweetens the batter and contributes to that irresistible crust.
- Salt: Just a pinch to enhance the chocolate and peanut butter flavors.
- Creamy peanut butter: The star ingredient that fills the center with its smooth, nutty warmth.
- Semi-sweet chocolate chips: Perfect for melting over peanut butter to add bursts of chocolatey goodness.
How to Make Peanut Butter Brownie Cups Recipe
Step 1: Preheat and Prepare
Begin by heating your oven to 350°F (175°C). Grease a mini muffin tin or line it with paper liners to make sure those brownie cups come out cleanly, preserving their perfect shape and texture.
Step 2: Mix the Brownie Batter
If you’re using a box mix, simply follow the package instructions—that’s your shortcut to delicious. For homemade lovers, whisk together melted butter, sugar, eggs, flour, cocoa powder, and salt until smooth and glossy, making sure not to overmix to keep that tender crumb you’re after.
Step 3: Fill the Muffin Cups
Spoon the brownie batter into each muffin cup, filling them about two-thirds full. This leaves the perfect space for creating that peanut butter-filled well after baking.
Step 4: Bake Until Almost Set
Pop those muffin tins in the oven and bake between 12 to 15 minutes. You’re looking for tops that are set but still soft enough inside, so testing with a toothpick that comes out with moist crumbs is key.
Step 5: Create the Peanut Butter Well
The magic happens immediately after baking — while the brownies are still warm, press the center of each cup lightly with your thumb or the back of a spoon to form a small well. This little indentation will cradle the peanut butter filling perfectly.
Step 6: Add the Creamy Peanut Butter
Drop about a teaspoon of creamy peanut butter into each well. The warmth of the brownies slightly melts the peanut butter, creating that gooey, irresistible center.
Step 7: Top with Chocolate Chips
Sprinkle semi-sweet chocolate chips right on top of the peanut butter. The residual heat will soften these chips slightly, giving each bite that perfect chocolatey finish.
Step 8: Cool and Set
Allow the brownie cups to cool in the muffin tin for 10 to 15 minutes — this helps them set without sticking. Then, carefully transfer to a wire rack to cool completely or enjoy them while still warm.
Step 9: Serve Warm or Chilled
Whether you enjoy these peanut butter brownie cups warm and gooey or chilled for a firmer bite, both ways deliver tremendous satisfaction with every mouthful.
How to Serve Peanut Butter Brownie Cups Recipe
Garnishes
Enhance the peanut butter brownie cups recipe by sprinkling a pinch of flaky sea salt on top to contrast the sweetness, or add a dollop of whipped cream for a dreamy, airy touch. Chopped peanuts sprinkled over the chocolate chips add delightful crunch and texture.
Side Dishes
These mini brownie cups pair beautifully with a scoop of vanilla ice cream or a simple drizzle of caramel sauce. For a refreshing twist, serve alongside fresh berries to cut through the richness with natural tartness.
Creative Ways to Present
Serve these treats on a rustic wooden board with a scattering of whole peanuts and mini chocolate bars to create a fun, inviting display. You can also place each brownie cup in a colorful mini cupcake liner for a festive occasion that feels extra special.
Make Ahead and Storage
Storing Leftovers
Store any uneaten peanut butter brownie cups in an airtight container at room temperature for up to two days to maintain their softness. Beyond that, refrigeration helps preserve the peanut butter filling and chocolate topping.
Freezing
These brownie cups freeze beautifully for up to three months. Just arrange them in a single layer on a baking sheet to freeze individually before transferring to a freezer-safe container, so you can enjoy a sweet treat anytime without losing texture or flavor.
Reheating
To bring back that melty, gooey goodness, warm your peanut butter brownie cups in the microwave for 10 to 15 seconds or until the centers soften. This quick step revives the freshly baked experience in a snap.
FAQs
Can I use natural peanut butter instead of creamy?
Absolutely! Natural peanut butter works well, but it may be a little less creamy and a bit oilier, which can slightly affect the texture of the center. If you enjoy a more robust peanut flavor, go for it!
Do I have to use a box brownie mix?
Not at all! Making your own brownie batter from scratch is easy and gives you control over the ingredients. Use our homemade batter instructions, and you’ll get equally delicious results that feel extra special.
How do I prevent the brownie cups from sticking to the pan?
Greasing your mini muffin tin well, or using paper liners, is key to easy removal. Allowing the brownie cups to cool slightly before taking them out will also help keep them intact.
Can I make these gluten-free?
Yes! Just substitute the all-purpose flour with a gluten-free blend suitable for baking. Be sure to check your brownie mix or ingredients to ensure all are gluten-free friendly.
What’s the best way to serve leftovers?
Leftover peanut butter brownie cups are delicious served slightly warmed to bring back the gooey texture, but chilling them offers a firmer, fudgier bite. Both ways are tasty depending on your mood.
Final Thoughts
There’s something so wonderfully comforting and indulgent about the Peanut Butter Brownie Cups Recipe that makes it a must-try for peanut butter and chocolate lovers alike. These little cups of happiness are easy to whip up and even easier to devour—perfect for sharing with friends or sneaking a few for yourself. I promise once you try them, you’ll be reaching for this recipe whenever you want a quick, scrumptious treat that feels like a hug in dessert form.
Print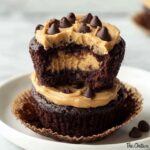
Peanut Butter Brownie Cups Recipe
- Prep Time: 10 minutes
- Cook Time: 15 minutes
- Total Time: 25 minutes
- Yield: 24 mini brownie cups
- Category: Dessert
- Method: Baking
- Cuisine: American
Description
These Peanut Butter Brownie Cups are a delightful twist on classic brownies, combining fudgy mini brownie bases with creamy peanut butter centers and melty chocolate chip toppings. Perfect as bite-sized treats for parties or a special dessert, they offer a rich, gooey texture that melts in your mouth with every bite.
Ingredients
Brownie Batter
- 1 box brownie mix (or homemade equivalent)
- 2 large eggs
- 1/2 cup melted butter (if making from scratch)
- 3/4 cup all-purpose flour (for homemade)
- 1 cup granulated sugar (for homemade)
- 1/4 teaspoon salt
- 3/4 cup cocoa powder (if making from scratch, inferred from standard recipe)
Toppings
- 3/4 cup creamy peanut butter
- 1/2 cup semi-sweet chocolate chips
Instructions
- Preheat and Prepare Pan: Preheat the oven to 350°F (175°C) and grease a mini muffin tin or line it with paper liners to prevent sticking.
- Make Brownie Batter: Prepare the brownie batter according to the box directions or, if making from scratch, combine melted butter, sugar, eggs, flour, cocoa powder, and salt until smooth.
- Fill Muffin Cups: Fill each mini muffin cup about two-thirds full with the brownie batter to allow room for rising.
- Bake Brownies: Bake for 12 to 15 minutes, until the tops are set and a toothpick inserted in the center comes out with moist crumbs attached.
- Create Wells: Immediately after baking, press the center of each brownie cup gently to form a small well for the peanut butter filling.
- Add Peanut Butter: Spoon approximately 1 teaspoon of creamy peanut butter into each well while the brownies are still warm.
- Top with Chocolate Chips: Sprinkle chocolate chips over the peanut butter so they soften and slightly melt.
- Cool: Let the brownie cups cool in the pan for 10 to 15 minutes to set, then transfer them to a wire rack to cool completely if desired.
- Serve: Enjoy warm for a gooey texture or chill them for a firmer bite.
Notes
- If using a homemade brownie batter, add 3/4 cup of cocoa powder to the ingredients.
- Mini muffin tins are ideal for bite-sized portions, but regular muffin tins can be used for larger brownies; adjust baking time accordingly.
- For extra indulgence, consider drizzling melted chocolate over the finished cups.
- Store leftover brownie cups in an airtight container at room temperature for up to 3 days or refrigerate for up to a week.
- To make this recipe gluten-free, use a gluten-free brownie mix or substitute the flour accordingly.


