“`html
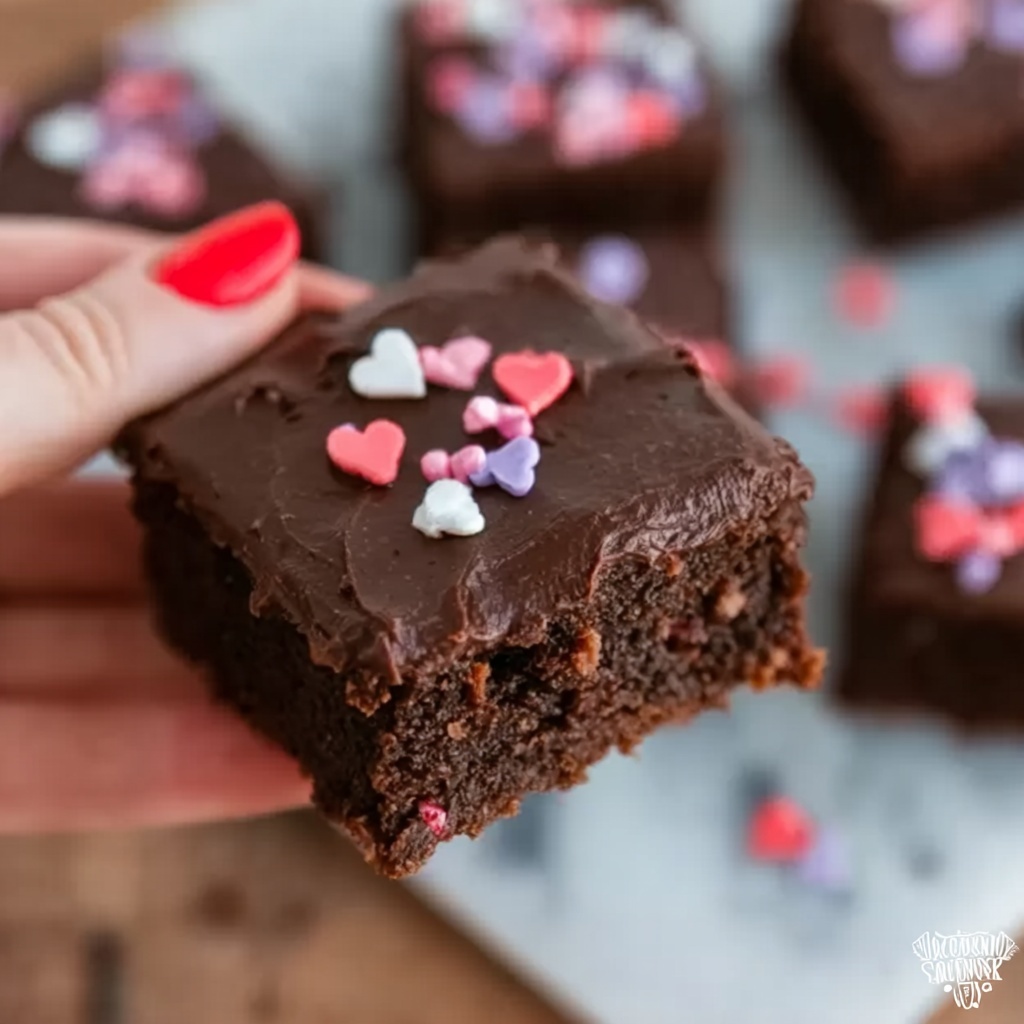
If you’re dreaming of a rich, fudgy treat that perfectly embodies the spirit of love and indulgence, this Valentine’s Day Brownies with Chocolate Ganache and Heart Sprinkles Recipe is exactly what you need. These brownies combine a heavenly blend of dark and milk chocolate chunks baked into a moist, decadent base, topped with a silky smooth ganache that sets to just the right softness, enhanced by playful heart-shaped sprinkles. Whether you’re celebrating with someone special or treating yourself, these brownies are an irresistible way to share the joy of Valentine’s Day.
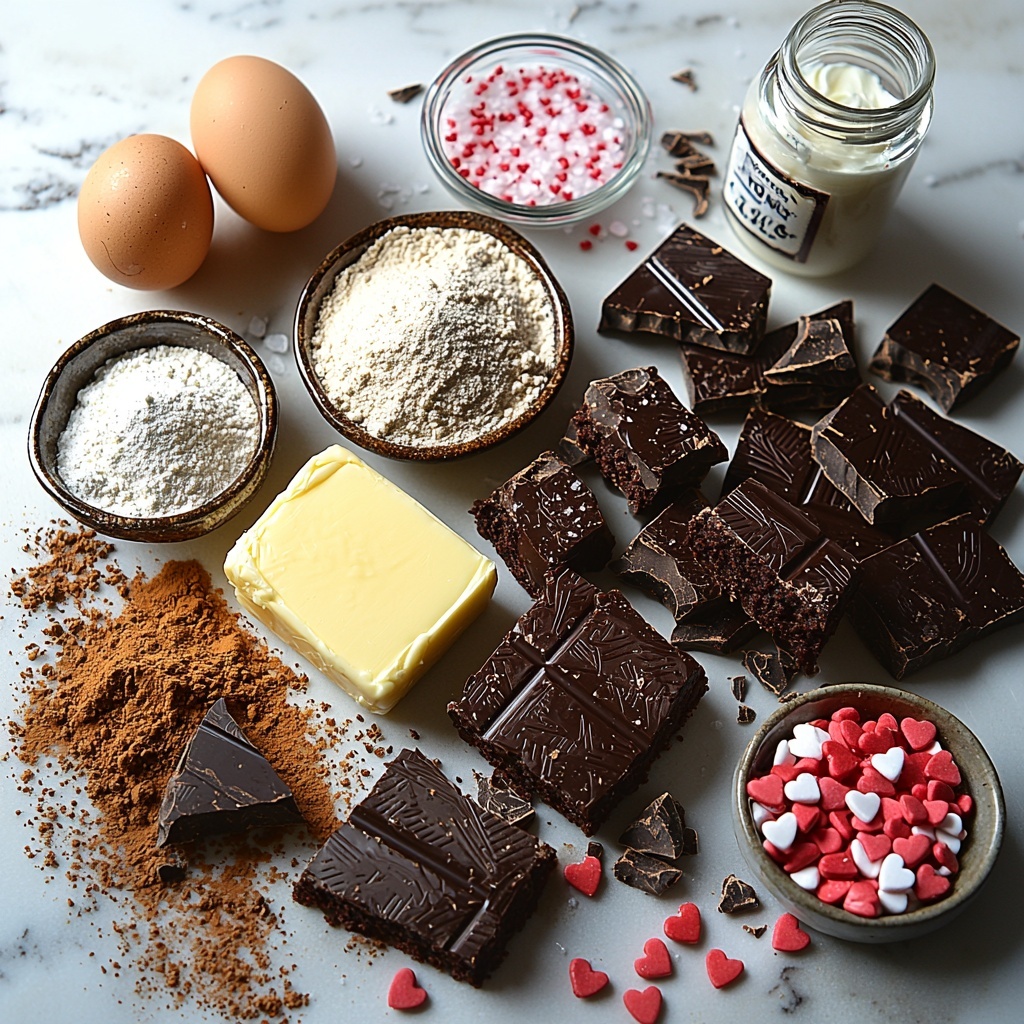
Ingredients You’ll Need
These ingredients are simple and essential, each playing a vital role in creating the perfect balance of moistness, chocolaty depth, and that creamy ganache finish that makes these brownies truly special.
- 200 g (7 oz) unsalted butter: Provides rich flavor and a tender crumb.
- 1 cup (230 g) firmly packed brown sugar: Adds moisture and a subtle caramel undertone.
- 2 large eggs, at room temperature: Bind the batter while adding richness and structure.
- 1 tsp vanilla extract: Enhances the chocolate flavors with a sweet, fragrant note.
- ½ cup (75 g) plain (all-purpose) flour: Gives the brownies their soft yet sturdy base.
- ⅓ cup (40 g) unsweetened cocoa powder, sifted: Brings intense chocolate goodness and a deep color.
- ½ tsp fine sea salt: Balances sweetness and intensifies flavor.
- 100 g (3½ oz) dark chocolate block, roughly chopped: For pockets of luxurious melted chocolate throughout.
- 150 g (5½ oz) milk chocolate block, roughly chopped: Adds creamy sweetness contrasted with dark chocolate.
- 1 cup (250 ml) thickened (whipping/heavy) cream: Creates the luscious base for the ganache topping.
- 200 g (7 oz) dark chocolate block, finely chopped: Used to make the rich, glossy ganache.
- Heart sprinkles (optional): For a festive, colorful, and fun finishing touch.
How to Make Valentine’s Day Brownies with Chocolate Ganache and Heart Sprinkles Recipe
Step 1: Prepare Your Tin
Preheat your oven to 180°C (350°F) or 160°C (325°F) if using a fan-forced oven. Grease and line a 20 cm (8 inch) square tin with baking paper, making sure to leave at least a 5 cm (2 inch) overhang on the sides. This lining will make it super easy to lift out your brownies when they’re baked and cooled.
Step 2: Melt the Butter
Gently melt the butter in a medium saucepan over low heat or microwave it in short 30-second bursts until just melted. Be patient here—you want it melted but not browned or burnt. This melted butter is the comforting, buttery base that keeps your brownies soft and rich.
Step 3: Mix the Brownie Base
Transfer the melted butter to a large heatproof bowl, then stir in the brown sugar until it’s glossy and well combined. Let this sit for about 5 minutes to cool slightly, then whisk in the eggs and vanilla until the mixture is smooth and uniform. This slow mixing helps create that fudgy texture everyone loves.
Step 4: Add the Dry Ingredients
Sift together the flour, cocoa powder, and fine sea salt, then fold these gently into the wet mixture. Take care to avoid overmixing so your brownies stay tender rather than cakey. Just combine until you no longer see dry streaks.
Step 5: Fold in the Chocolate
Gently fold through the chopped dark and milk chocolate blocks. These chunks will create melty pockets and little bites of pure chocolate delight in every bite. Pour the batter into your prepared tin and spread evenly with a spatula.
Step 6: Bake Your Brownies
Bake for 30 to 35 minutes. You’re aiming for a set surface with a center that still jiggles slightly when the tin is shaken. A skewer inserted into the middle should come out with thick, moist crumbs attached, never completely clean. Let the brownies cool completely in the tin on a wire rack before moving on.
Step 7: Prepare the Chocolate Ganache
Heat the thickened cream gently in a saucepan until just hot or use the microwave in short bursts. Pour the hot cream over the finely chopped dark chocolate in a heatproof bowl and stir slowly with a spatula until it becomes smooth and shiny. If it’s not quite coming together, a few brief microwaving bursts do the trick.
Step 8: Finish with Ganache and Sprinkles
Pour the glossy ganache over your cooled brownie base and tilt the tin gently to spread it evenly. Scatter your heart sprinkles all over for that extra touch of Valentine’s Day magic. Refrigerate for 1 to 2 hours until the ganache firms up but remains soft to the touch.
Step 9: Slice and Enjoy
Use the parchment paper overhang to lift the brownies out of the tin. Slice into nine generous squares or 16 smaller pieces with a sharp knife, wiping the blade clean between cuts for neat edges. Now you’re ready to share these little pieces of love!
How to Serve Valentine’s Day Brownies with Chocolate Ganache and Heart Sprinkles Recipe
Garnishes
While the heart sprinkles add a festive flourish, you can also dust the brownies lightly with cocoa powder or powdered sugar for a delicate wintery touch. Fresh berries or a dollop of whipped cream make excellent companions, adding freshness to balance the richness.
Side Dishes
A scoop of vanilla or raspberry sorbet complements the luscious chocolate perfectly. For a more decadent experience, try serving alongside rich coffee or a glass of red wine to accentuate the deep cocoa flavors.
Creative Ways to Present
Present these brownies on a beautiful wooden board, scatter rose petals around the edges for romance, or stack them in a rustic tin lined with parchment for gifting. Wrapping each square in parchment tied with a red ribbon can turn them into charming Valentine’s Day favors for friends and family.
Make Ahead and Storage
Storing Leftovers
Keep your Valentine’s Day Brownies with Chocolate Ganache and Heart Sprinkles Recipe fresh by storing them in an airtight container in the refrigerator for up to 3-4 days. This keeps the ganache properly set and the brownies moist without drying out.
Freezing
You can freeze these brownies for longer storage by wrapping them tightly in plastic wrap and then placing them in a freezer-safe container or bag. Freeze for up to 2 months. When you’re ready, thaw them overnight in the refrigerator for the best texture.
Reheating
To enjoy the brownies slightly warmed, leave them out at room temperature for about 30 minutes or microwave a single square for 10-15 seconds. Reheating softens the ganache just a touch and releases that fresh chocolate aroma that’s impossible to resist.
FAQs
Can I use a different type of chocolate for the ganache?
Absolutely! While the recipe calls for dark chocolate for a rich, intense ganache, you can substitute with milk chocolate or even white chocolate depending on your preference. Just keep in mind that milder chocolates will result in a sweeter topping.
What if I don’t have thickened cream for the ganache?
If thickened cream isn’t available, you can use heavy whipping cream or double cream as a suitable alternative. These have similar fat contents that help create the smooth, glossy texture perfect for ganache.
How do I know when the brownies are perfectly baked?
The key signs are a set surface and a center that still has a slight wobble when you gently shake the tin. Inserting a skewer should pull out moist crumbs—not a clean skewer—ensuring the brownies are fudgy rather than dry.
Can I make these brownies vegan or dairy-free?
To make a vegan or dairy-free version, substitute the butter with plant-based margarine and use dairy-free chocolate and cream alternatives like coconut cream. The texture will be slightly different but still delicious!
Why are there both dark and milk chocolate pieces in the brownie batter?
Using both types creates a delightful contrast: the dark chocolate adds intense depth and slight bitterness, while the milk chocolate brings a creamy sweetness. Together, they make each bite interesting and indulgent.
Final Thoughts
There’s nothing quite like sharing a batch of these Valentine’s Day Brownies with Chocolate Ganache and Heart Sprinkles Recipe to make your celebration extra special. The combination of fudgy chocolate, silky ganache, and whimsical sprinkles turns a simple dessert into a memorable gesture of love. I hope you have as much joy making and eating these as I do—it’s truly a recipe that warms the heart and sweetens the day.
“`
Print
Valentine’s Day Brownies with Chocolate Ganache and Heart Sprinkles Recipe
- Prep Time: 20 minutes
- Cook Time: 35 minutes
- Total Time: 2 hours 20 minutes
- Yield: 9 jumbo brownies or 16 smaller brownies
- Category: Dessert
- Method: Baking
- Cuisine: American
Description
These decadent Valentine’s Day Brownies are a luscious treat combining rich dark and milk chocolate chunks baked into a fudgy cocoa base, topped with a smooth dark chocolate ganache and optional heart sprinkles, perfect for sharing or gifting on a special occasion.
Ingredients
Brownie Base
- 200 g (7 oz) unsalted butter
- 1 cup (230 g) firmly packed brown sugar
- 2 large eggs, at room temperature
- 1 tsp vanilla extract
- ½ cup (75 g) plain (all-purpose) flour
- ⅓ cup (40 g) unsweetened cocoa powder, sifted
- ½ tsp fine sea salt
- 100 g (3½ oz) dark chocolate block, roughly chopped
- 150 g (5½ oz) milk chocolate block, roughly chopped
Ganache Topping
- 1 cup (250 ml) thickened (whipping/heavy) cream
- 200 g (7 oz) dark chocolate block, finely chopped
- Heart sprinkles (optional)
Instructions
- Prepare the tin: Preheat the oven to 180°C (350°F) (160°C/325°F fan-forced). Grease and line a 20 cm (8 inch) square tin with baking (parchment) paper, leaving at least 5 cm (2 inches) overhang for easy removal after baking.
- Melt the butter: Gently melt the butter in a medium saucepan over low heat or microwave in 30-second bursts until fully melted (about 60 seconds).
- Mix the base: Transfer the melted butter to a large heatproof bowl, add the brown sugar and stir until glossy and well combined. Let it cool for 5 minutes, then whisk in eggs and vanilla until smooth.
- Add the dry ingredients: Sift in flour, cocoa powder, and sea salt, then mix gently until just combined to maintain a tender texture.
- Fold in chocolates: Carefully fold through the roughly chopped dark and milk chocolate pieces to distribute chocolate chunks throughout the batter evenly.
- Bake: Pour the batter into the prepared tin and spread evenly. Bake for 30-35 minutes until the surface is set and a skewer inserted comes out with thick, moist crumbs. The center should have a slight wobble, indicating fudginess. Allow to cool completely in the tin.
- Heat the cream: Warm the thickened cream gently over low heat or in the microwave until hot but not boiling, about 30–45 seconds in short bursts.
- Make the ganache: Place finely chopped dark chocolate in a heatproof bowl, pour hot cream over it, and stir gently until smooth and glossy. If needed, microwave in 10-second bursts, stirring until fully combined.
- Finish and set: Pour the ganache over the cooled brownie base, tilting the tin to level the surface. Sprinkle heart sprinkles on top if desired. Refrigerate for 1-2 hours until ganache sets but remains soft to the touch.
- Slice and serve: Use the parchment paper overhang to lift the brownie from the tin. Cut into 9 jumbo squares or 16 smaller squares using a sharp knife, cleaning the blade between cuts for neat edges.
Notes
- For best texture, avoid overmixing the batter once the dry ingredients are added to keep the brownies tender.
- If not adding ganache, allow the brownies to cool completely before slicing for cleaner cuts.
- Room temperature eggs help achieve a smooth, well-mixed batter.
- These brownies keep well refrigerated in an airtight container for up to 3 days.
- You can substitute the chocolate chunks with your favorite chocolate chips or chopped nuts if preferred.

